顯示具有 Nail Stickers- Printing Mode 標籤的文章。 顯示所有文章

2013年4月12日 星期五

Manicura verde menta con rosas doradas. Paso a paso. By aydita

 Hola a todas!! ¿Qué tal estáis? Ya estamos a Martes y hoy quiero enseñaros una manicura que he realizado ideal para esta primavera. Como tono base he utilizado un verde menta de Astor y para las flores he utilizado unas plantillas en forma de rosas de la web KKcenterhk y un esmalte dorado de Catrice. Tengo que decir que para hacer esta manicura he tenido algún problema. Lo primero es que lo intenté hacer y dejé la plantilla demasiado rato puesta y luego no se despegaba. El segundo problema que tuve fue que al despegar la plantilla se me estropeaba el esmalte base, por eso hay que dejarlo secar mucho tiempo (una hora o más) pero al final conseguí que me saliese la manicura con la plantilla. Así me ha quedado :


Lo primero que hice fue aplicar una capa del esmalte verde menta (136) de Astor.


Como vi que no cubría lo suficiente di otra capa de esmalte, con lo cual tarda aún más en secar.


Para realizar los diseños de las rosas utilicé la plantilla NPM-M025 de la web KKcenterhk las cuales podéis conseguir aquí por algo mas de 2 euros.


Para dar color al diseño utilicé un esmalte dorado (goldfinger) de Catrice.


Lo primero que tenemos que hacer es seleccionar el tamaño de la plantilla que más valla con nuestra uña.


La aplicamos en el dedo. Se supone que hay que poner la parte redondeada en la zona de la cutícula de la uña pero yo lo hice al revés para que la rosa se viese derecha mirando hacía mi.


Lo pegamos bien para que el dibujo salga perfecto y no se mueva.


Y aplicamos el esmalte dorado encima.


Según apliquemos el esmalte tenemos que retirar la plantilla porque si no se pegará mucho y no saldrá bien el diseño quedándose la plantilla pegada en la uña.


Y este es el resultado.


Por último apliqué un top coat efecto gel de Essence encima de todas las uñas.


Y así me quedaron.


Como veis no están perfectas ni mucho menos. Me puse nerviosa al ver que no me salía bien el dibujo y me quedaron hasta mal pintadas. También me quedó algún trozo de la plantilla en el dedo anular pero si lo quitaba me cargaba el diseño y os lo quería enseñar. En resumen creo que ya le he cogido el truco a estas plantillas pero hasta que se le coge es bastante complicado de hacer.

¿Vosotras habéis probado estas plantillas?

¿Os gusta el resultado?

Un beso y feliz Martes! :)


Thank you, aydita
Check out aydita blog
http://www.aydita.blogspot.com.es/2013/04/manicura-verde-menta-con-rosas-doradas.html

2013年3月4日 星期一

Pokemon Challenge: Bug and a Review By samplesentaeyen


I have a little bit of time to work on my blog today, so I'm going to try to get caught up on some things and schedule these posts in advance. I'm a little behind on the Pokemon Nail Challenge, so today I'm going to show you my bug nails. I also have a review for you with this.

I say I want to show you my bug nails.. but really these are more Pokemon inspired than actual Pokemon. I just wasn't feeling it and just wanted to do something simple.

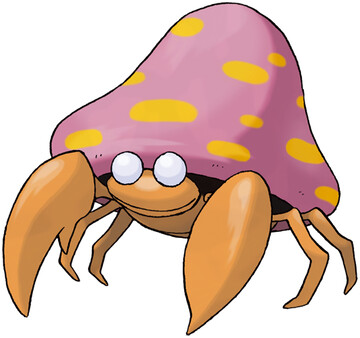
Here is what inspired this manicure.... Parasect!

Of course, shiny Parasect as well :)
Here's a short description of Parasect: "Like its previous stage, Parasect is an insectoid creature. However, in this stage, the mushroom has completely overtaken the host's body."


For this manicure I used just three Zoyas: Paloma, Arizona and Pippa. It was almost Valentine's Day when I did this manicure, so I decided to do a spin on Parasect's mushroom pattern. I used the Two Heart Nail Printing Mode item number NPM-M043 from KKCenterHK.com for this look. To give the manicure a more "mushroomy" look, I applied one coat of Julep's matte top coat.

The printing modes are $2.67 and you get a set of 11 stickers, which is good because it's enough for all fingers plus one to practice with. These did take some practice. Basically, these are masking stickers. You paint your nails, let them dry. Next, you peel off one sticker from the packaging, roll it on your fingers a few times so the glue doesn't stick to your nail. Next, you place the sticker on your nail, then fill in the design with another polish. The final step is to remove the sticker. Sorry I don't have pictures of the entire process... I'll keep that in mind for next time!


You can see in this next picture my first attempt with this item. As you can see, it doesn't quite look like a heart. I do want to mention that I tried to use the same "mode" on my thumb multiple times so that may be why it messed up a little bit. The instructions said to apply a moderate layer of polish but I found that a somewhat thinner coat worked best.


 I found these to be a little time consuming.. it took about half an hour to do all of my nails, just with the heart design. I was really happy with the final effect however! It was fun and this would be great for anyone who isn't well practised in nail art.


 Sorry the pictures aren't cropped.. I'm using Mike's computer and I'm not used to his operating system. I thought the images were cropped until I imported them here :P

Thanks to KKCenterHK for providing me with the printing mode to try. All opinions stated here are my own. Yours may differ.

Thank you, samplesentaeyen
Check out samplesentaeyen blog
http://samplesentaeyen.blogspot.hk/2013/02/pokemon-challenge-bug-and-review.html

2013年1月9日 星期三

NOTD: Pretty Hearts (Tutorial) by makeupandfashionfreak

Hi all,
Hope you guys are enjoying your SUNDAY. ME?? After making my daughter sleep, spending some time with myself, BLOGGING.Later in the evening Mr. Ag is taking me out for DINNER and Sanchi will be staying with her grandmother :)

What I believe in is "no matter how busy your life is, you should spend sometime of the day with yourself" This helps in bringing positivity and happiness in LIFE.
Today, being a Sunday (FUN DAY) I thought I will do a FUN post for you all and I came up with this. Hope you all like it.

Products Used:

  • KKcenterHK Nails Printing Mode (hearts). You can buy it HERE for USD $2.67
  • Deborah Milano Shine Tech:55 (SWATCH HERE )
  • Revlon Top Speed Nail Enamel: PEACHY
  • Maybelline Express Finish:Top Coat

How To Use:

My Experience:

  • One has to be really very careful while peeling the sticker otherwise the sticker might tear and the design will get ruined. But no matter how carefully and quickly I peeled off the sticker, it tore. 
  • Some part of the sticker was stuck on the nail and was really difficult to remove.
  • Many stickers got wasted because of this.

BUT still I managed to do it PERFECTLY at last. The final result was quite BEAUTIFUL and was liked by my hubby too. Hope you guys had fun reading. I had real fun doing it :)
P.S. Product sent by PR. HONEST review.


Thank you, makeupandfashionfreak
Check out makeupandfashionfreak blog
http://makeupandfashionfreak.blogspot.in/2012/09/notd-pretty-heartd-tutorial.html

Black cats... will they bring me any luck!? by nailcrazy69


Hi my friends!

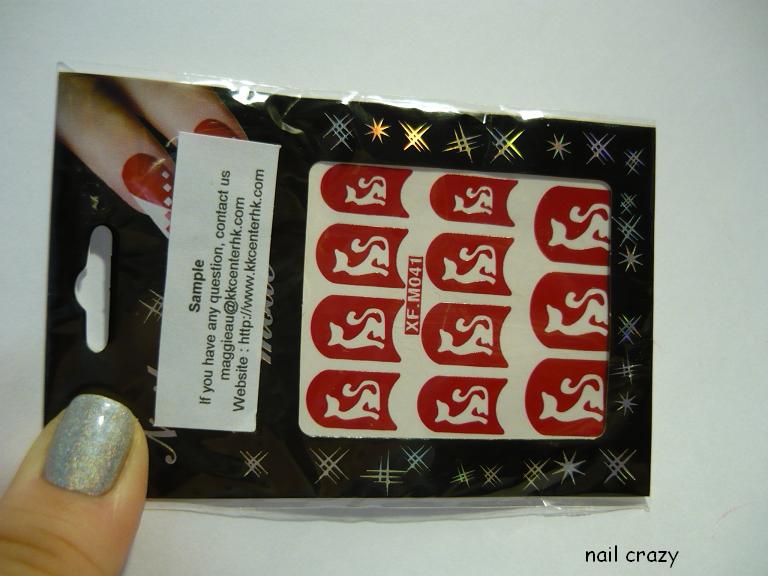
I have another of KKCenterhk.com's goodies for you. This time it's the nails printing mode with cats!

Danas imam još jednu zgodnu stvarčicu iz asortimana KKCenterhk.com. Ovaj put su to šablone s macama!  

You have to unpack it, of course.
Morate ih raspakirati, naravno.
First step is to stick one of them on your nail...
Prvi korak bio bi staviti neku od njih na nokat...
 after that you need to apply generous coat of any nail polish, pull the sticker up... oops!
nakon čega treba nanijeti velikodušan sloj bilo kojeg laka, povući naljepnicu... ups!
If you end up with the result like I did, you're doing something wrong. That's why there are instructions on the back side of cover, read it carefully before you start to do anything, don't get smart like I did . The glue is pretty strong so you really need to stick it few times on your skin, before it goes on nail.
Ako završite s rezultatom poput moga, znači da nešto radite naopako. E, zato služe uputstva na poleđini, treba ih pročitati prije no što se krene išta raditi, ne pravite se pametni poput mene . Ljepilo je prilično jako pa ga treba više puta zalijepiti na kožu prije no što dođe na nokat. 
After reading the instructions the results will definitely be much better, just look at mine . Applying topcoat over it is not a bad idea.
Nakon pročitanih uputstava rezultat će vam sigurno biti puuuno bolji, pogledajte samo moj . Nanošenje nadlaka nije loša ideja. 


I love it! It's easy and if you want something different on your nail, but you're not so sure in your drawing skills, this is great solution for you! The only downside of these modes is that if you want to wear them on every nails, they'll do just for one manicure.  But you can save a few if you put them only on a nail or two . You can find it under code: NPM-M041. But there's a really big choice of this stickers here.
Even my cat approved these stickers, see how he raised his paw!
Krasno! Uopće nije teško raditi s njima i kad želite nešto drugačije na noktima, a niste baš sigurni u svoje crtačke vještine, ovo je super rješenje! Jedina mana je što će poslužiti samo za jednu manikuru, ako ih stavite na sve nokte. Ali možete ih i razvući, tako što ćete ih upotrijebiti samo za nokat ili dva . Možete ih pronaći pod kodom NPM-M041. A veći izbor možete vidjeti ovdje
Čak je i moj mačak odobrio ove naljepnice, vidite kako je podigao šapu!


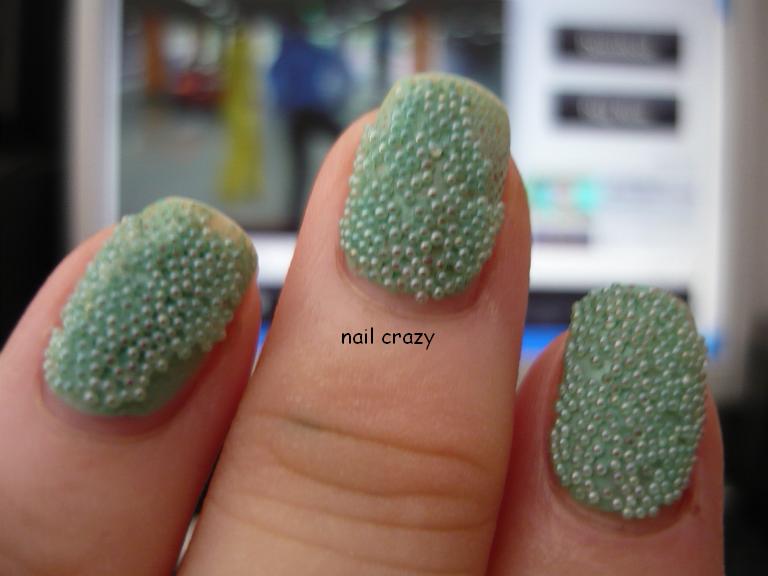
I promised you yesterday to show you my caviar manicure 24 hours later. In that 24 hours I had an average day, I prepared a lunch for my family, wash the dishes, did some minor cleaning around the house, took a shower before I went to bed, sleep all night, went to the shopping this morning, prepared a breakfast... so, I'm really impressed, I thought they'll all fall off in a few hours. If they were meant to be wear on a special occasion, they would most certainly fulfill its mission. You can't wear it all day... or maybe you can - if you don't do anything ... when I think of it, it's not a bad idea at all .
Jučer sam vam obećala pokazati kavijar manikuru nakon 24 sata. U ta 24 sata imala sam sasvim prosječan dan - spremila sam ručak, oprala suđe, odradila nešto sitno spremanja po kući, istuširala se prije spavanja, spavala skoro cijelu noć, jutros bila u shoppingu, spremila doručak... i moram priznati da sam zbilja impresionirana, mislila sam da će jedva izdržati koji sat. Kad bi se ovakva manikura nosila za neku određenu priliku, sasvim bi ispunila vaša očekivanja. Ne možete nešto ovakvo nositi čitav dan... ili možete - ako ne radite ništa ... što, kad malo bolje promislim i nije tako loša ideja .


While you're spending your money at KKCenterhk.com, don't forget to use my nailcrazy69 code for 10 % off! Enjoy it girls!
Dok trošite svoj novac na KKCenterhk.com site-u, ne zaboravite iskoristiti kod nailcrazy69 za popust od 10 %. Uživajte cure! 

Till we meet again... keep your nails polished, Žana

p.s. this product was sent to me for review 

Thank you, nailcrazy69
Check out nailcrazy69 blog
http://nailcrazy69.blogspot.hk/2012/09/black-cats-will-they-bring-me-any-luck.html