2013年7月31日 星期三

REVIEW: KKcenterhk Holographic Nail Foil By florysworld


Sziasztok!

A mai manis posztban egy olyan dolgot próbálok ki, amihez még nem volt szerencsém, ez pedig nem más, mint a körömfólia. Eleinte egyáltalán nem tetszett a dolog, de amikor a lehetőség adott volt, hogy kipróbáljam, nem hezitáltam túl sokat.

Today's post is about a nail decoration thing I never used or tried before, and this is the nail foil. First, I did not like at all but when I had the chance to try one I haven't hesitated.

A fóliák közül egy viszonylag színeset választottam, ami így önmagában tök jól néz ki, de ha nincs 3 centis műkörmünk, akkor egy körömre felvarázsolni az összes színt, teljességgel lehetetlen. Így levágtam egy darabot, majd azt félbevágtam és nekiláttam a munkának. 

I have choosen a colorful one which is very nice like this, but if you don't have at least 3 cm false nails, it is impossible to appyl for one nails all the colours. So I just cut some pieces and then cut them half, after I started to work. 


A ragasztó olyan, mint egy körömlakk, ugyanolyan ecsettel kell felvinni, bár picit nehezebb, mivel az ecset szálai kicsit megmerevednek a ragasztótól. Emiatt csíkosan tudtam felvinni, ahogy a képen is látszik. Az első próbálkozásom csúfos kudarcot vallott, mert túl vastagon kentem fel a ragasztót (mellékelt képen). Nekiláttam hát újra. A biztonság kedvéért néztem tutorialt róla.

The glue is like a nail polish, it has the same brush, however it's a bit harder to use as a nail polish because it sticks and the brush is a little bit hard. You can see on the picture after I applied it came out striped because I used to much, so my first try became a complete disaster.


Használat: Kenjük fel vékonyan a ragasztót a körmünkre, várjuk meg, amíg színtelenné válik. (Én még többet vártam, kb. 10-15 percet.) Ezután fektessük rá a fóliadarabot a körmünkre, majd egy fülpiszkáló segítségével simogassuk rá a köröm felületére. Ha kellő időt vártunk a ragasztóval, akkor szinte azonnal a körmünkre simul a fólia. A széleke érdemes odafigyelni, hogy ne legyen cikkcakkos. Óvatosan húzzuk le a fóliát a körmünkről és voilá...készen is vagyunk. 

How to use: Apply a thin coat of the glue and let it become transparent. (I waited a little bit more, around 10-15 minutes.) After, I put on the piece of the foil then use an ear stick to smooth it around your nail. It takes only few seconds, then we can take off the foil piece. Voilá...we are ready. 


Nem vagyok tökéletesen elégedett a végeredménnyel, de gyakorlat teszi a mestert. A színe viszont iszonyatosan tetszik. 

I am not totally satisfied witht he result but it's going to be better with some practise. Althoug the colour is amazing.


A terméket a KKCenterHKtól kaptam tesztelésre, ami a véleményemet nem befolyásolta. Ha megtetszett, az alábbi linken tudjátok megvásárolni, 10% kedvezményt pedig a florysworldkóddal tudtok érvényesíteni. 

I got this product from KKCenterHK for review and it did not influenced my opinion. If you like it, you can order if you click on the link. Use florysworld code for 10% discount.


Mit gondoltok a körömfóliáról? Próbáltátok már? 

Hogy tetszik a blog új arculata?


Thank you, florysworld
Check out florysworld blog
http://florysworld.blogspot.be/2013/05/review-kkcenterhk-holographic-nail-foil.html

iew - KKCenterHK: Silver Holographic Nail Foil By nailzcraze


Today I'm going to share with you my experience with nail foil I received from KKCenterHK for review. They sent me two foil patterns of my choice and a nail foil glue, and in this post I'm going to review the silver holo foil. 
I actually picked this nail foil because of it's pattern, you can take a better look at it at their site since I had hard time capturing the beauty of the foil on camera. It's really sparkly, reflective and looks very festive. The foil is 1.5 meters long and 4 cm wide, it's rolled and placed in a plastic jar, which was really good because I've ordered nail foil from other shops before and most of them came in a ziplock bag which didn't keep it in a perfect shape as this one was.
I decided to apply a base color as background in case some parts wouldn't transfer, so I picked Essie No Place Like Chrome for this job and applied one coat of it. I waited for it to dry completely, and then I applied one thin coat of the foil glue. This glue dried quite fast and turned from white to clear, it was very sticky compared to another foil glue I have tried.
Once the glue looked dry but tacky, I placed the nail foil on my thumb and pressed it with a cotton pad to make the application better and smooth. So I rubbed it for a while, but I couldn't transfer it at first. It seemed to me that the foil was glued pretty good to the nail, and no matter how much I rubbed it or tried to lift the foil piece from the nail, it wouldn't lift off. I think it might be my fault, maybe I didn't wait long enough for the glue to dry completely.
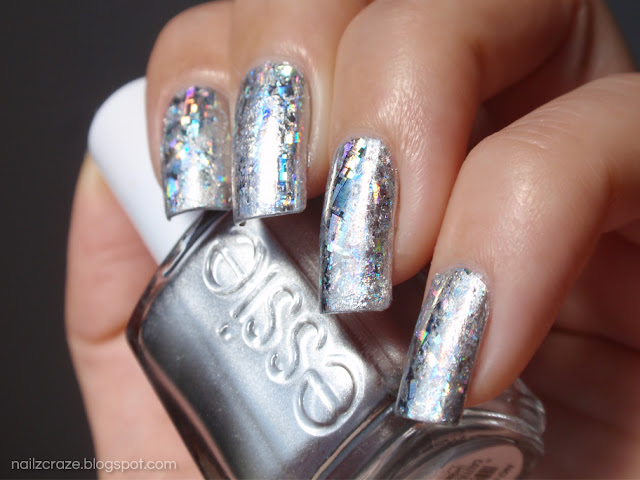
Then I tried another method, sort of tapping the foil piece on the nail, so it transferred well but in small pieces, so unfortunately I didn't get the whole pattern but only small parts of it. I kept applying the foil with tap motion to the nail until it didn't stick anymore, and the result is before you. It's a pretty cool metallic look, but not as beautiful as the foil itself. It didn't transfer much of the pattern which was a bit sad for me, but I think I will give it another try. I don't know if it's the glue's fault or mine for not waiting enough, but I plan to experiment a little and let you know my results the next time I try it.

You can purchase the nail foil I used at this review at KKcenterHK shop along with other gorgeous patterns, and also find many nail and beauty related products on their shop.
Hope you find this review useful, thanks for reading! :)


Thank you, nailzcraze
Check out nailzcraze blog
http://nailzcraze.blogspot.co.il/2013/05/review-kk-center-hk-silver-holographic.html

Review: KKCENTERHK's ES-A561 By glorychen


Hi Girls~~
This is my first sponsored review of falsies products that was generously sponsored by KkCenterHkKkCenterHk was kindly sent me 1 box of lower lashes. It took a month for me to receive this item. But Im so happy coz it finally arrived on my doorstep last week via standard airmail. Thank you KkCenterHk. ^^ Im sorry if maybe it's kinda late to review because I was really busy lately, but I hope you enjoy. Cheers! :)


ABOUT KKCENTERHK
KKCenterHk.com  is an online shop based in Hong Kong specializing on different types of wigs, nails art, makeup, falsies, fashion, and many more beauty products with the most affordable price, good quality, and profesional services. 


What I have is ES Handmade Black Transparent Stem Lower Eyelashes-A561. If you want to see other ES brand's products, you might want too see their other products on KkCenterHk's website  because they really have a lot of beauty products with affordable price, not only lashes but also eyeshadow pallete, eyeliner, etc. 

 
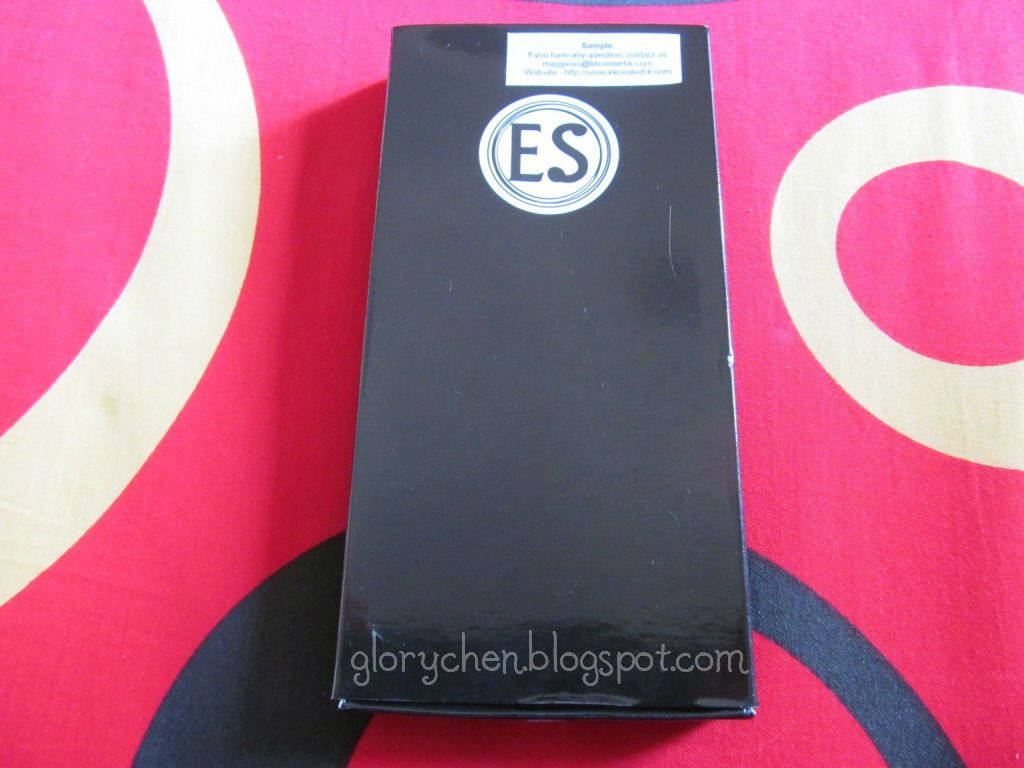
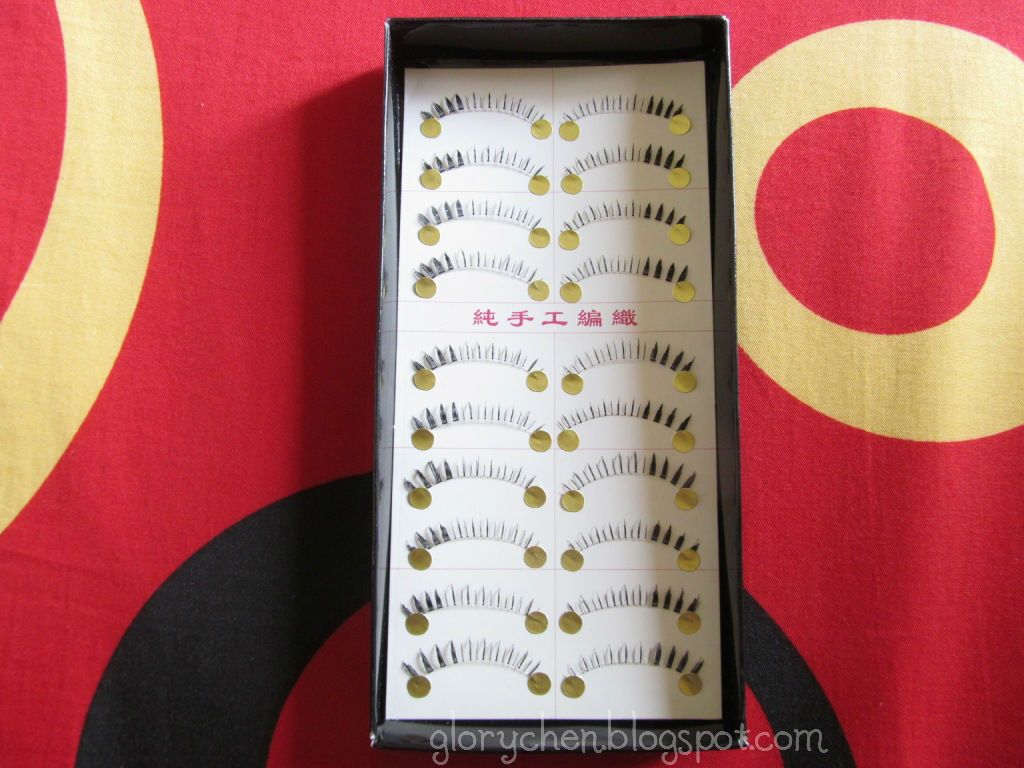
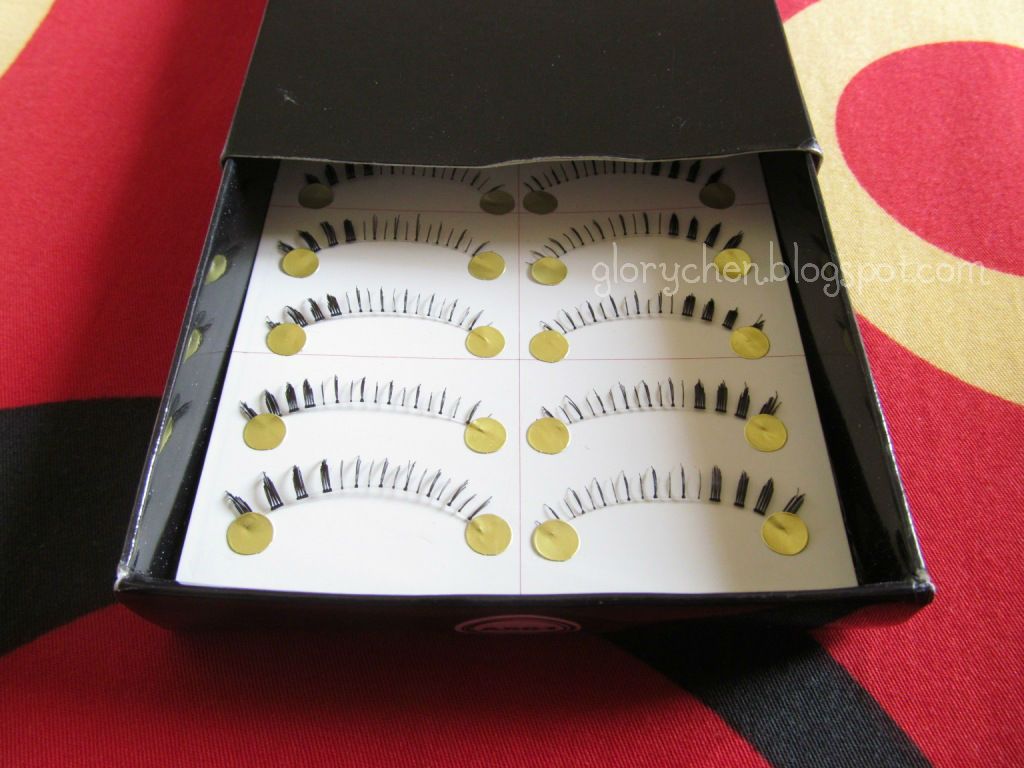
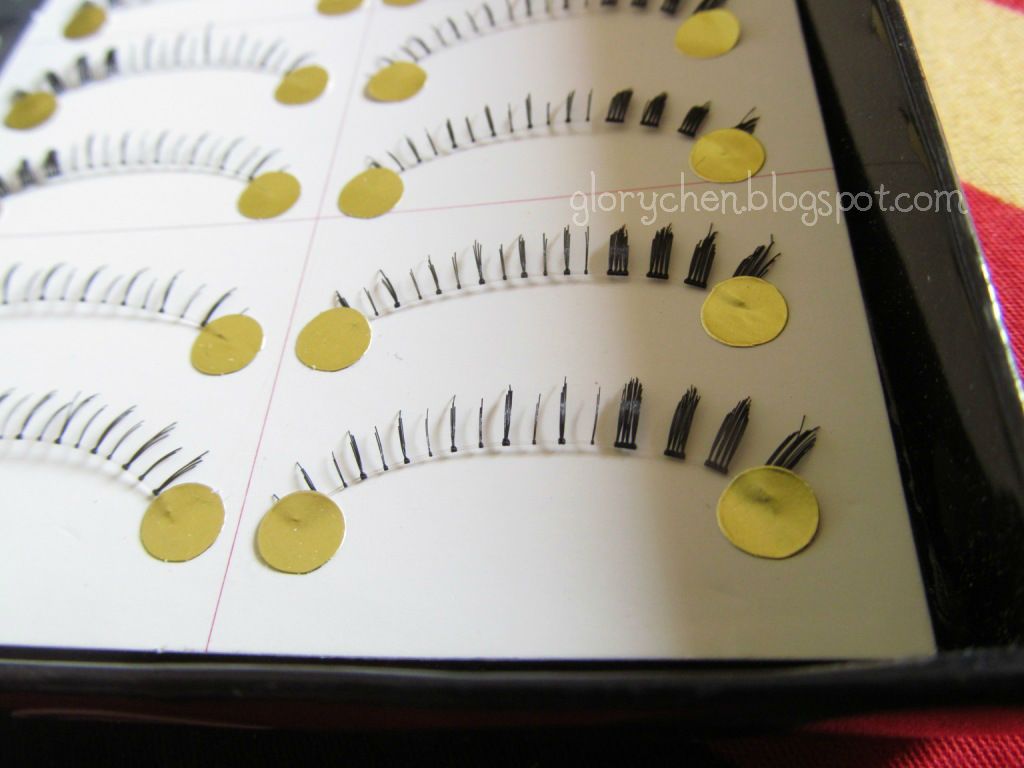
 The lashes came in a nice black cardbox which is a good idea to protect them. The box contain 10 pairs of lower lashes as shown below and they are pretty neat arranged on a sheet of paper. The lashes were perfectly safe because it was packed with a buble wrap.

And, here's how the lower lashes ES-A561 looks like...


ES-A561 LASHES INFO
  • 100% new, authentic & handmade lashes
  • 10 pairs in one pack, black lashes and very thin transparent stem
  • Can be re-use many times
  • Make your eyes look bigger and attractive
  • Suitable for party or everyday use
  • Glus is not included
  • Price is $28


These lashes are handmade and have a clear band. The band is quite thin but believe me they are not fragile at all. That's why I said that these lashes have a good quality. Before using this lashes, I need to cut the excess band so it will not hurt my eyes.


 I remember the first time I wore my first lower lashes, it was really hard to bend under my eyes and my eyes looks totally weird like an alien. :P But I have to say that Im totally impressed by this lower lashes that KkCenterHk has sent to me. This lashes band is clear and flexible so it makes them easier to apply. This is my second lower lashes and Im so happy to wear it coz my eyes looks bigger and cute like a doll. LOL. They also extremely comfortable & look really natural on my eyes. Am I look like a doll? I hope it doesn't look quirky... Haha...

This is it looks like with me wearing this ES-A561 lower lashes on my eyes. Can you see them? :) I also wore this lashes to join Indonesian Beauty Blogger May 2013 Makeup Challenge. ^^


I chose this style of lower lashes coz this lower falsies looks match with my upper lashes. This is the first time I feel a litte bit more confident in my makeup. Hehe. I dont need to apply mascara anymore coz my eyes looks dramatic already with a pair of thick upper lashes and this ES-A561 lower lashes.


LIKES
-They packed really nicely
- Good quality & very affordable price
-They blend nicely
- Really comfort and didn't poke my eyes
- Thin, Very transparent band
- Soft & flexible fibers
- Looks natural on my eyes
- Suitable for gyaru makeup and everyday use

DISLIKES
- Glue is not included
- Only available in KkCenterHk's website

MY RATING
5/5

RECOMMENDED? 
YES, you should try it! This lashes is especially recommended for those who like to create gyaru makeup or dolly eye effect. :)


 If you're interested with this lashes, go get yours at KkCenterHk's website and you may find some products that you would like. And don't forget to use my coupon code: "glorychen" to get 10% on your purchases. This coupon code is valid until Jan 31st, 2014. :)


That's all for today!
Thank you so much for reading.
 Please follow me on GFC & Bloglovin' to stay updated. 
Have a nice day, girls! Bye"... ^^

**Disclaimer**
 Please note that although this is a sponsored review, the thoughts and opinions stated are 100% my own opinion based on my own experience.


Thank you, glorychen
Check out glorychen blog
http://glorychen.blogspot.hk/2013/05/review-kkcenterhks-es-a561-lower.html

Mint and Turquoise Nail Design By any-rainbow


Napokon, novi post od mene! 

Nedostajao mi je blog, mackanje noktiju, vasi komentari... Ali proteklih meseci ili nisam imala internet ili vremena ili mi nokti nisu bili dovoljno lepi i dugi za blog. Nadam se da ce se to promeniti, da ce sve biti okej i da cemo se vise druziti. :]

U ovom postu cu vam pokazati manikir sa moje dve omiljene boje, mint i tirkiznom, sa proizvodima koje sam dobila od KKCenterHK

Naravno, koristila sam Essie Mint Candy Apple kao podlogu.

Finally, a new post from me!

I missed my blog, nail art, your comments... But last few months I didn't have internet connection or free time or my nails weren't just pretty or long enough for blog. I hope that will change, that everything will be okay and that we'll hang out more. :]

In this post I will show you manicure with my two favourite colours, mint and turquoise, with products I got from KKCenterKG

Of course, I used Essie Mint Candy Apple as a base. 


Posle baze iskoristila sam ovu tanku traku da bih napravila linije. Na sajtu je oznacena kao Laser Gold Striping Tape Line Nail Decoration Sticker. Tanka je 0,6 mm i duga oko 180cm. Naravno samolepljiva je. Dobro se lepi ali sam primetila da mi se malo lepka s nje prenelo na nokte, zato mozda ne bi bilo lose da se vise koristi za manikire sa kojih se nece odlepljivati. Svakako, solidna tracica koju sam dugo prizeljkivala. Njena cena je 0.90 americkih dolara. 

After the base I used this thin tape to make lines. On the site it's called Laser Gold Striping Tape Line Nail Decoration Sticker. It's only 0.6 mm thin and long about 180 cm. Of course It's masking. It's sticks very good for the nail but I noticed that a little bit of the glue transferred to my nails, so It might be better to use this tape for manicures which don't require taking the tape off. Anyway, it's a good tape that I wanted for so long. It costs 0.90 USD.


Sledeca stvar koju sam koristila su ove predivne tirkizne sljokice velicine svega 0,2 mm. Na sajtu su oznacene kao Laser Glitter. Dolaze u plasticnoj teglici od 10g kao i svi njihove sljokice, a to je zaista solidna kolicina. Ako ih ne koristite profesionalno, necete ih potrositi godinama. Kostaju 8.41 americkih dolara.

The next thing I used for this manicure is this beautiful turquoise glitter. It's only 0.2 mm big. On the site It's named Laser Glitter. It comes in plastic container just like all of their glitter. It weights 10g which is really a lot If you won't use It professionally, It can last you for years. Glitter costs 8.41 USD.


Nalakirala sam jedan sloj Essie Mint Candy Apple laka, sacekala da se osusi, nalepila tracice, namazala sloj providnog laka i posula sljokice. Zatim uklonila tracice, ocistila nokte... A evo i kako je sve to ispalo! 

I applied one coat of Essie Mint Candy Apple and waited until it dried, applied tape, then a coat of clear polish sprinkled glitter on it, cleaned my nails... And this is how It looks!


Nadam se da vam se svideo post i manikir. Cim nadjem vremena usledice neke promene na blogu. Pozadina, nova slika, smajlici i mozda jos ponesto. Ljubim vas do sledeceg posta! :* <3

I hope you like this post and manicure. As soon as I have some free time I will change my blog a bit. New cover photo, background, smileys and maybe few more things. Until next post.. :* <3


Thank you, any-rainbow
Check out any-rainbow blog
http://any-rainbow.blogspot.hk/2013/05/mint-and-turquoise-nail-design.html