顯示具有 ANE-Nail 標籤的文章。 顯示所有文章

2014年10月17日 星期五

review: kkcenterhk full nail water decals by iloveprettycolours

Hey everyone! 
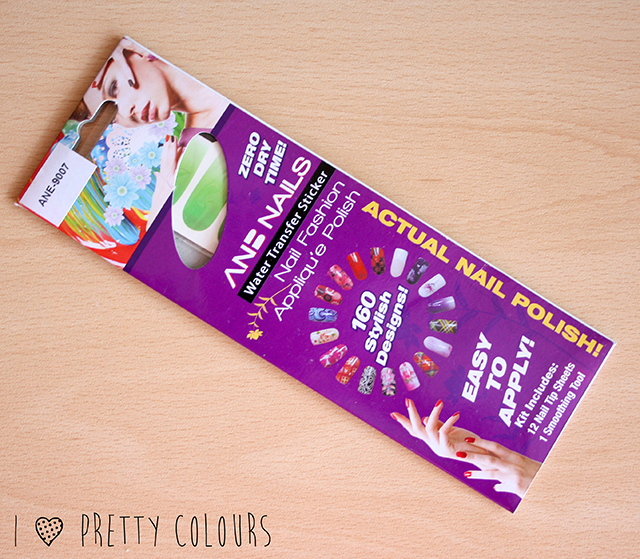
Today's post is going to be all about these green gradient nail wraps that I got from  KKCenterHK.

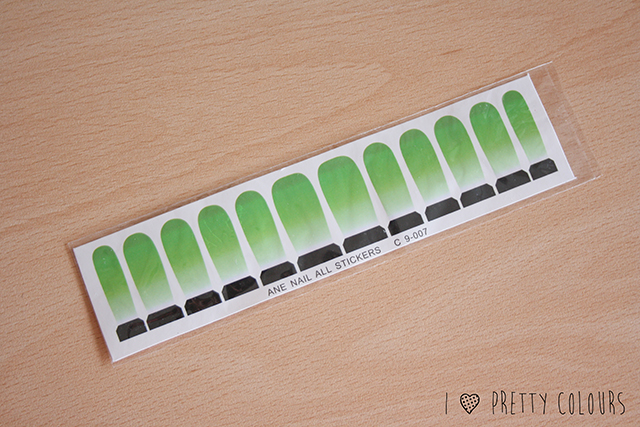
The package contains 12 nail wraps and a small nail file to file off the excess. There are many different variations, but I decided to try out the gradient ones.


Once removed, you can see that all of the nail wraps are adhered to the sheet. There are no score lines, so that means that you will have to cut them by hand.


The tools you will need in order to apply the wraps are the following:
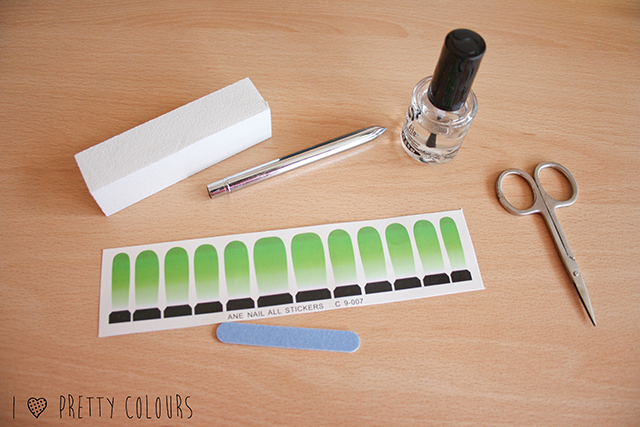

• the wraps
• a nail file and/or buffer
• scissors
• any tool that will help you smooth them out
• top coat

First off, you start by cutting each wrap. This process will take about 5 minutes. If you are not really capable of handling scissors (like me), you probably will end up with crooked edges :) I'd suggest leaving just a bit less than 1 mm space around the wrap and you will be okay. Then, you just need to choose the right size for each finger and you're ready for application.


Afterwards, you want to dip your nail wrap in a small cup of water (or place it on a wet sponge). After a couple of seconds, the wrap will come of its backing and will be ready for application. I applied a thin layer of top coat underneath the wrap, even though it's not written in the instructions, because when I tried without a base layer it wouldn't stick at all. After you smooth the wrap on your nail, the instructions say to apply a top coat. However, the top coat that I used crinkled the wraps and they didn't turn out nice looking :( Not applying top coat is also not an option, mostly because the wraps are really thin and they will chip in a couple of hours tops.


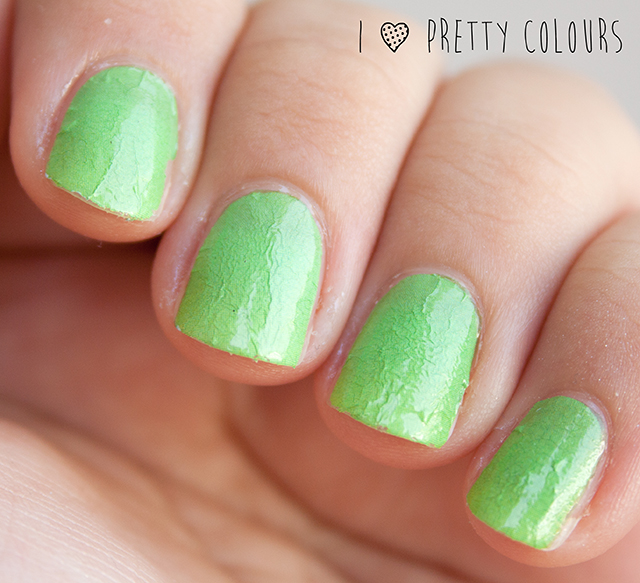
You get a nice looking dark green to light green gradient, but unfortunately in order to get the full gradient you need to have really long nails.


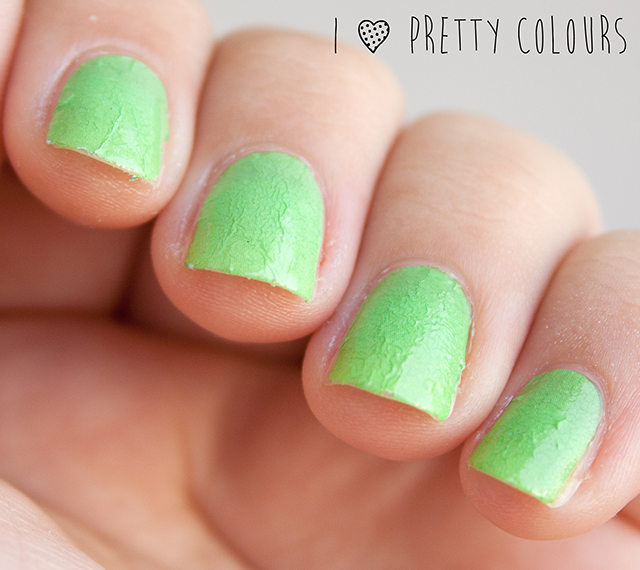
Even with a nice top coat, the wraps don't last too long, you'll get chips here and there and overall they are way to thin to be handled.


What I really loved about them is they can be removed really easy with a bit of polish remover. It says on the packaging that they are made with 100% polish, so when you remove them, instead of getting little pieces of plastic or whatnot, they disintegrate with the help of your polish remover.

Pros
• great variety of designs
• application is moderately easy
• they don't leave sticky residues once removed
• can be removed using regular polish remover

Cons
• slight sizing issues with each piece - you may need to trim them down
• crinkling after application of top coat - might be my mistake, though
• the wraps aren't scored, so you have to cut them by hand
• they don't last too long


Overall, my opinion is a bit here and there about this product. They have a couple of minor issues that when combined, make these wraps a bit difficult to handle, especially if you are looking for an easy manicure that looks good. They didn't look too bad even when they crinkled, but like I previously mentioned that might have been my mistake.
If you want to try them for yourself and see if they work, you can get these water decals here for $3.70. You can see the other designs here.
You can get 10% off your order over at KKCenterHK using the code: "iloveprettycolours".
KKcenterhk125x125jpg banner

The product was sent to me for review. However, my opinion is 100% honest and is not affected by this.

Thanks for reading :)


Thank you, iloveprettycolours
Check out iloveprettycolours blog
http://iloveprettycolours.blogspot.hk/2014/08/review-kkcenterhk-full-nail-water-decals.html

2014年8月6日 星期三

KKCenterHK's ANE-NAIL Flower Transfer Sticker Decals by tornadocalli

Ughhhhhh you guys! I am OBSESSED with these water decals from KKCenterHK! They're such a gorgeous design that's sweet and nail arty without being in your face and obnoxious. A high-gloss top coat made them look unreal! I'm not ashamed to say I was very sad when these reached the end of their life-cycle.


 For 10% off at KKCenterHK, use code: TORNADOCALLI (expires Jan. 31. 2015)


**This product sent to me by KKCenterHK. This is my honest, unbiased review.


Thank you, tornadocalli
Check out tornadocalli blog
http://tornadocalli.blogspot.hk/2014/05/kkcenterhks-ane-nail-flower-transfer.html

2014年4月24日 星期四

ANE-NAIL - Delusory Swirl Sticker Decals Review by ithinitybeauty


*This product was sent to me for review but as always will contain my full and honest opinion! :)

Allo polish Pals,
How are you today? Can you really believe we are at the weekend again, already? I don't know where the time goes! I hope you've had a more successful week than me, Unfortunately I just don't seem to be able to manage my syndrome very well lately and as soon as I feel better I'm back where I started. That said I am feeling insanely positive about things right now :) Today I have some pretty 'Delusory Swirl' water decals from KKCENTERHK to share with you, I had fun working these out as I had only applied them once before. Don't forget: You can get a 10% discount on all Kkcenterhk's items when you use the coupon code 'ithinitybeauty' :)

These water decals come in a set of 12 patterned decals and a small file for removing excess decal.
The instructions for the water decals are really simple, they come in a long strip with enough patterns to cover all your nails; With scissors I carefully cut them out and started by applying my base coat to clean nails. Working one nail at a time I applied the water decals by holding one pattern with tweezers under water for perhaps half a minute. The decal then slid of its backing with absolute ease. I then took the curved side of the decal and lined it up just under my cuticle. With practise I realised that they are a little firmer then you'd expect so I began to pull them tightly as to avoid creases (I discovered this after the thumb and index where you see creases) I used a finger to hold the decal at the top of the nail as I rearranged their positions.

Because these water decals are made from real nail polish it means there is absolutely no dry time – so once you've mastered how to apply them this can be a great way to get an impressive but very speedy manicure for a night out with no time to paint.


I really like these water decals and am impressed with how easy they are to apply, as you see with the two nails with creases it didn't take long to feel like I knew what I was doing. Have you tried full nail water decals before? Would you wear these?
Have a great day!
Love
Ithi


Thank you, ithinitybeauty
Check out ithinitybeauty blog
http://www.ithinitybeauty.com/2014/04/ane-nail-delusory-swirl-sticker-decals.html

2014年3月17日 星期一

Review: KKCenterHK Water Transfer Stickers by asmallbudgetbeauty

Over the weekend I tried out the Cute Dot and Bow water transfer stickers from KKCenterHK. Basically they are just like water decals, the are just made to cover your whole nail.

It comes with a strip of 12 water transfer stickers (decals) and a 'smoothing tool' which is just a small nail file. Below is what the strip looked like after I had cut the individual decals.


The directions say to clean, cut & trim to fit, soak & apply, smooth and apply top coat. It also says to peel off the protective film, but there was no protective film on mine. So I followed all the directions and the decal would not stay on my nail, it just kept sliding off, so I went to their website to see if there were any tips. On their website it says to soak the decal for 10-15 minutes, ain't nobody got time for that LOL and they will come off a lot sooner. It also says to dry the decal off with something so I used a cotton ball, it did help keep it from sliding around, but it still did not adhere to my nail. The second issue I had was the decals were so long and my nails are not, so most of the bow got trimmed off.


For me these were a fail, I didn't ever bother with putting top coat on them, I just took the photo and peeled them off. The packaging says by applying a top coat the decals will last up to 7 days, and only 1-2 days with out. Maybe they would have worked better if I had applied a base coat, the instructions did not say anything about it so I didn't do it. I also think they should have a long and short version so us nubby girls could use these too with out loosing any details.

KKCenterHK's Full Water decals cost $7.20

If you shop at KKCenterHK you can save 10% off your order with this coupon code: SBB2013


Thank you, asmallbudgetbeauty
Check out asmallbudgetbeauty blog
http://asmallbudgetbeauty.blogspot.hk/2014/03/review-kkcenterhk-water-transfer.html

2014年2月27日 星期四

KKCenterHK Water Decals Review by boombasticnails

**press samples**

Hello :)  It's been quite a long time since my last post ... I've been quite busy but I'm almost back!

These water decals from KKCenterHk are extremely cute and pretty!  Let's get started :)

First up, some full nail water decals, here's the link.  The color on my pointer & ring is 2 coats of DiorRiviera.  Finished everything off with a coat of top coat.
These water decals were a little fragile, that I broke a little piece on my pinky so I used Riviera to cover it.  This pattern was not as vivid as I thought it was, that's why I used a bright coral shade to brighten up the whole mani!  I loved it and hope you will too :)
Here are some single image water decals, link here. I didn't notice there were wordings above the sunflowers until these were placed on my nails, OOOPS!!!  You see my pointer with the wording cut off?  Yikes! 
The base color is Don't Talk Bach to me by OPI and topped it off with a thin coat of China GlazeTechno, water decals placed, a coat of Gelous then finished everything off with a coat of top coat.
 These 2 photos below are how they looked before the water decals with no top coat.
Loved this combo and of course, loved the water decals on these too :)
My code is BN10 which grants you 10% off, if you decide to buy anything from KKCenterHk.  

What do you think?  Thank you for dropping by :)

**products provided for my honest review**


Thank you, boombasticnails
Check out boombasticnails blog
http://www.boombasticnails.com/2014/02/kkcenterhk-water-decals-review.html

2013年12月9日 星期一

Floral Water Decals with Zoya Tomoko and Revlon Popular By polisharmoire


Zoya Tomoko Revlon Popular Water Decal C 5-004I was sent two products by KKCenterHK for review purposes. They’ve also given me a coupon code to share with my readers, simply enter the code polisharmoire and receive 10% off until the end of January, 2014! The products sent were a pack of ANE-NAIL 12 Pc Floral Transfer Sticker & Files #5004 (item # ANE-5004) and a gorgeous N.NAIL 15 Piece Synthetic Fiber Art Design Brush Set With Case (item #JR1129).
I’ll be reviewing the floral water decals today which I hastely applied just before I jetted off to Australia. This photo was taken in Australia around 2 days after I put them on hence I don’t have my usual black background – do like the white or black background better for manis? The water decals held up quite well and I got my first chip at the 5 day mark. The water decals were also a relatively quick way to spruce up my mani without having to spend a lot of time creating intricate nail art! I have three coats of Zoya Pixie Dust Tomoko, a gold texture polish on my pinky and three coats of Revlon Popular, a pink crelly with silver glitter on my index finger.
Ane Nails Water Transfer Sticker Water Decal C 5-004The pack of decals comes with 12 nails worth of designs where 6 of them mirror the other 6. They are long enough that you would be able to use one decal on two nails if you have short nails. These decals are also fully opaque so no base polish colour is required. I followed the same steps as stated in the water decal tutorial here to apply them with the only difference being I had to make sure that I trimmed the cuticle end of the decal well. This was because one of the nail decals had printing that was a tiny bit offset. I also had to carefully file off the excess on the tip of the nail using the file included in the pack of decals. These decals can be stretched to fit your nail during the drying process if they end up being a bit too narrow for your nails. If you are like me and use the decals in skittlette manis, one 12pc pack of decals should last you for quite a few manis!
Want to be updated on new posts?
Follow me via Facebook and Bloglovin or the links at the top of my sidebar.
If you enjoyed this post I’d really appreciate it if you took a second to “like” it.


Thank you, polisharmoire
Check out polisharmoire blog
http://polisharmoire.com/2013/11/21/floral-water-decals-with-zoya-tomoko-and-revlon-popular/

2013年12月2日 星期一

Vintage Roses... By thepolishedmommy

 
press sample
 

Today I wanted to share these full cover floral water decal nail stickersfrom KKCenterHk.....


The directions are a bit confusing, the images show you submerge the sticker in water than apply it to the nail but the text says to just apply it straight onto the nail. Follow the images NOT the text! These decals are not like regular nail stickers that have a sticky backing.

With these you need to select the size that will fit your nail, there's not many to chose from as you only get 12 decals, cut it out then submerge it into water. While the decal is being prepped, apply your base coat. I tried applying these decals straight to my nails but they simply slid off, so you want to have a tacky base in order for these to apply correctly. Before your base coat fully dries, remove the decal from it's paper backing, apply it to your nail (you'll want to go one nail at a time) and smooth out any air bubbles. Trim off the excess length, don't worry if it doesn't lay perfectly flat top coat will fix that. Apply a generous amount of top coat, and gently press down any wrinkles with your top coat brush.  It may sound difficult but once you try it, it's super easy.


I did notice that the decals cracked slightly after applying top coat, but for me that wasn't a problem. I actually like the look of the tiny fractures because they add a vintage feel to the roses, like old porcelain. 

Price: $7.67 for 1 sheet that contains 12 sizes, but you can use the code 'thepolishedmommy' for 10% off your order.


Thank you, thepolishedmommy
Check out thepolishedmommy blog
http://www.thepolishedmommy.com/2013/11/vintage-roses.html