As a nail polish lover, I see to it that I try, at least once, the different nail polish trends that have been popping out like crazy lately.
One of the nail trends that I had been wanting to try out was caviar manicure.
It's where you basically stick really small beads onto your nails.

Your nails should look like you just dipped them in caviar, hence the name of this manicure. Before I even tried it, I had already known I wouldn't be a big fan. I could imagine the beads falling off my nails one by one just several minutes after application. Haha. I wash my hands a lot, and I just can't imagine these beads staying put on my nails for a whole day, even with top coat.
With that said, I still think it's worth a try. Just for fun! I think it would be perfect for nail sparties or overnights with girl friends!
To achieve the caviar look, you'll need the following.
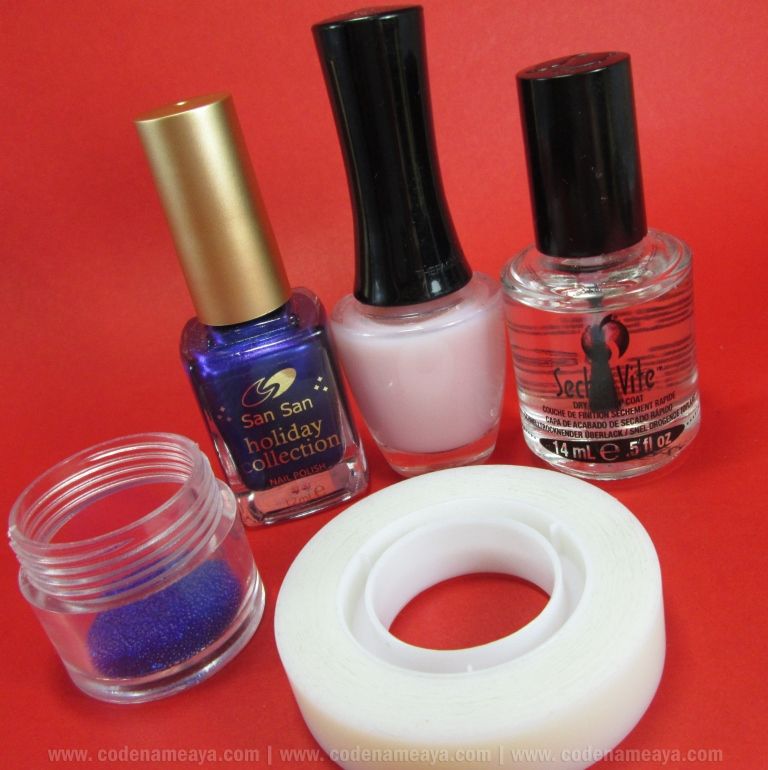 |
| N.Nail sapphire microbeads, San San nail polish in Purple Topaz, The Face Shop base coat, Seche Vite, magic tape |
- Microbeads/caviar beads - You can get these online or at craftstores. There are also brands that sell sets of nail polishes and caviar beads (Ciate, for example, and local brand Bobbie).
- Base color - Choose a nail polish shade that is closest to the color of your beads. You don't have to worry about this if you have one of those matching-polish-and-beads sets already.
- Base coat - To protect your nails from stains
- Top coat - To seal the beads in place and help them stay on longer
- Tape (optional) - If you're creating a design that needs to have clean edges, use tape as your guide.
- A piece of paper, a bowl, a plate, a shallow box or anything that can catch the excess beads
- Small brush - For clean-up
Regular Caviar Manicure
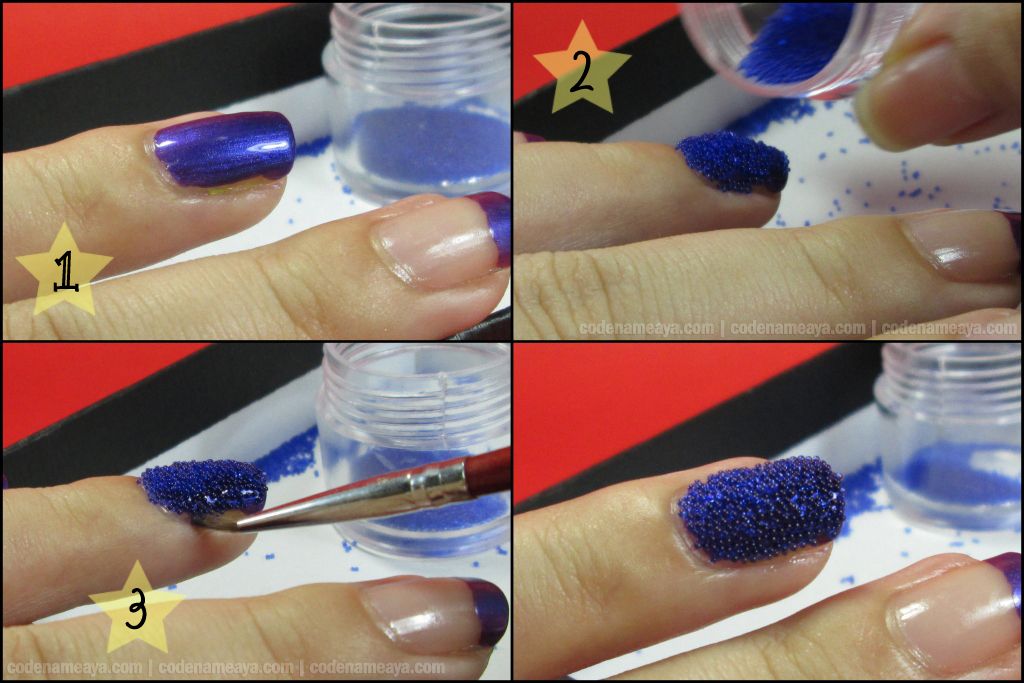
1. Apply base coat and one layer of your base color. Let it dry for a few seconds, then apply a second coat.
2. While the polish is still wet, pour the microbeads over the nail, making sure that the entire area is covered. Make sure you're doing this over a plate or a shallow box or something!
3. Set the beads in place by gently patting them onto your nail. Clean up and remove excess beads using a small brush.
4. Finish off your caviar mani by sealing the beads in place with a generous amount of top coat!
Let's spice things up a bit by turning the classic French-tip into a caviar manicure.
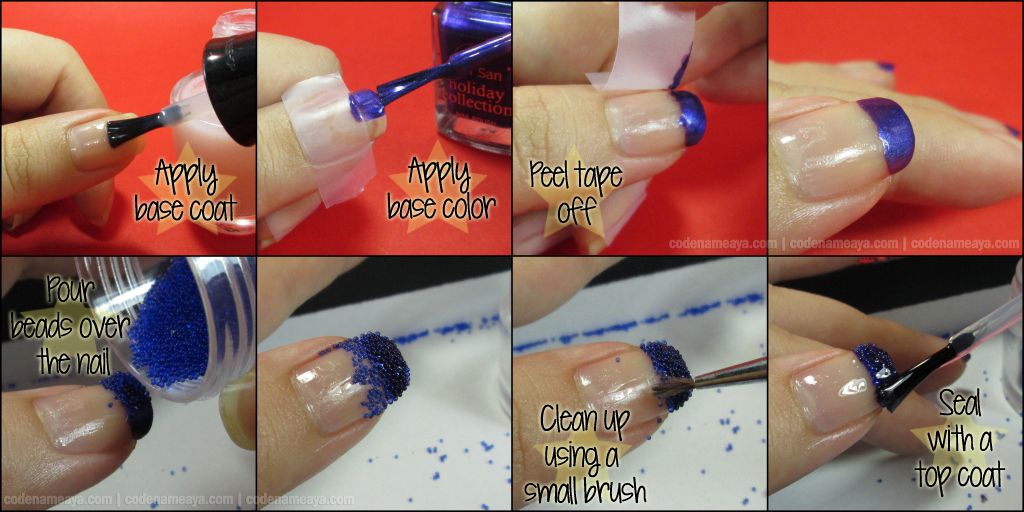
1. Apply base coat to protect your nails and keep it from getting stained.
2. Using the tape as guide, apply one layer of the base color on the tip of the nail, then let it dry for a few seconds.
3. Apply another layer of the base color, then peel the tape off the nail.
4. While the polish is still wet, pour the microbeads over the tip of the nail.
5. Set the beads in place by gently patting them onto your nail.
6. Use a small brush to remove the excess beads.
7. Seal the beads in with a generous amount of top coat, and you're done!
Application looks easy and fun, right? The hard part is getting all the spaces and gaps filled up. Mine always ends up with bald spots. Haha. The application is a little messy too, with the falling beads and all, but cleaning up is waaaay easier here than in water marbling and sponging.
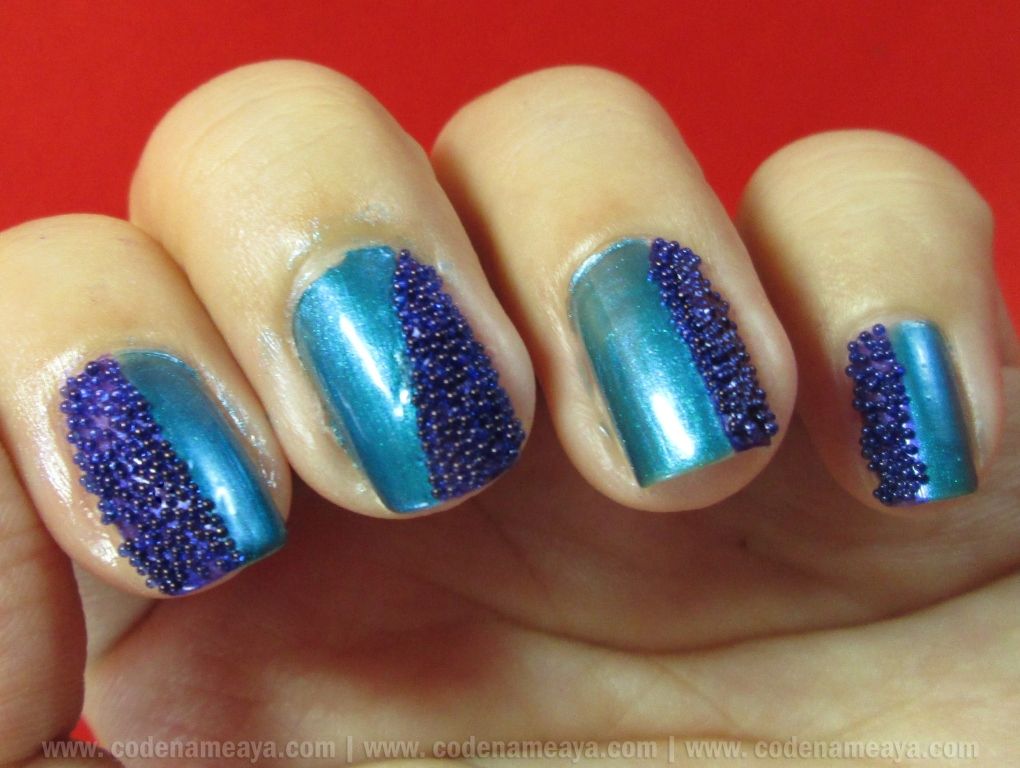
You're not limited to the regular and the French tip caviar mani, of course! You can go nail-artsy with these beads, too.
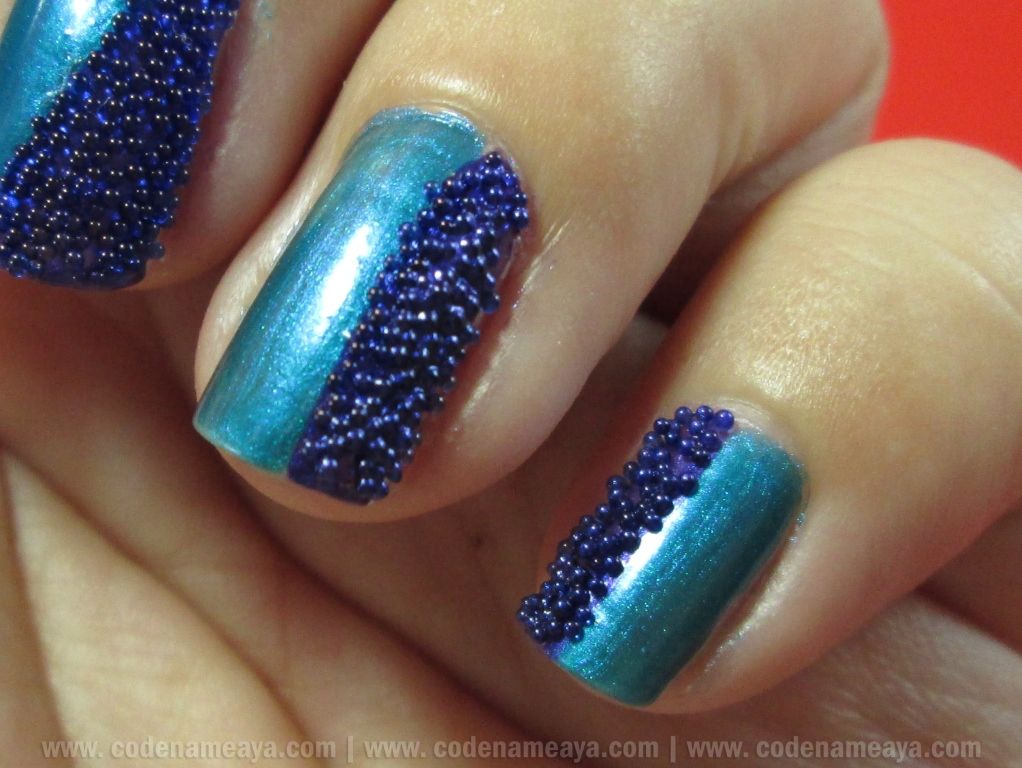 |
| Dark blue microbeads over San San nail polish in Purple Topaz and Midnight Opal |
I'm sure you're wondering how long my caviar manicure lasted. I wash my hands a lot. A few beads came off after several washes, even with top coat. Nothing major, really, but I still removed them after just a day because I couldn't function properly with beads on my nails. Without top coat, these beads wouldn't stand a chance! The top coat really does help seal the beads in, so don't skip it!
Oh, and by the way, the microbeads I used here were N.Nail DRN383 sapphire microbeads, available at kkcenterhk.com.
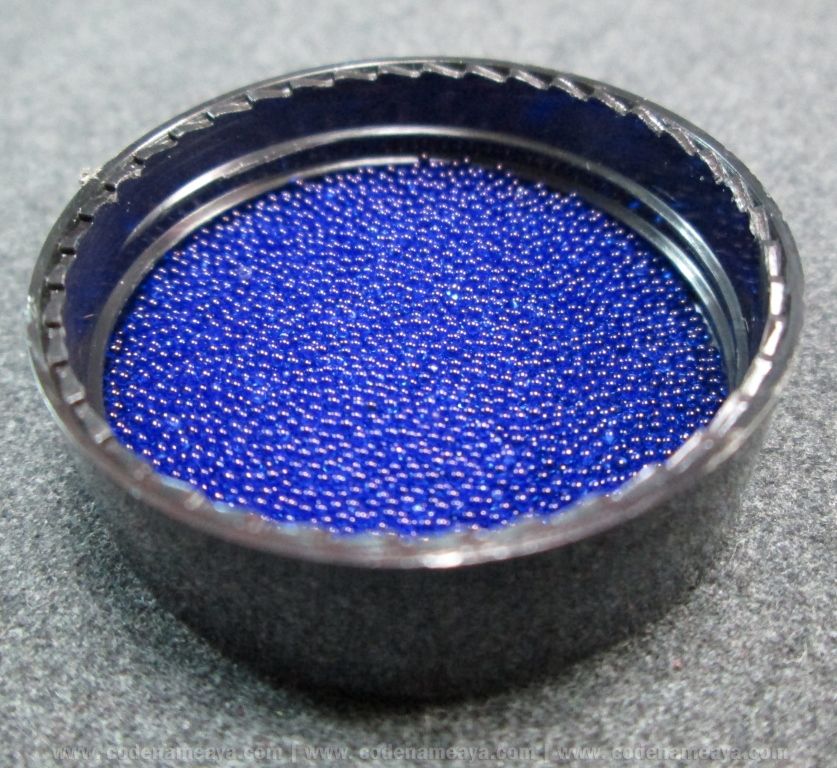 |
| Fish eggsssss! |
These N.Nail microbeads come in 12 different colors. Click *here* to check them all out! Get a 10% discount by using the code AYA upon checkout.
Honestly, I'm not yet so sure whether I like this caviar manicure trend or not. Mine always ends up messy and butas-butas. Maybe I should give it another chance. Practice makes perfect, after all. Feel free to share your caviar mani tips and tricks by commenting below! :)
Disclaimer: Product was received for free, but the views and opinions expressed in this post are purely mine and based on my own experience with the product.
Thank you, codenameaya
Check out codenameaya blog
http://www.codenameaya.com/2013/08/caviar-manicure.html


2.jpg)