顯示具有 Nails printing mode (Brand) 標籤的文章。 顯示所有文章

2013年1月9日 星期三

NOTD: Pretty Hearts (Tutorial) by makeupandfashionfreak

Hi all,
Hope you guys are enjoying your SUNDAY. ME?? After making my daughter sleep, spending some time with myself, BLOGGING.Later in the evening Mr. Ag is taking me out for DINNER and Sanchi will be staying with her grandmother :)

What I believe in is "no matter how busy your life is, you should spend sometime of the day with yourself" This helps in bringing positivity and happiness in LIFE.
Today, being a Sunday (FUN DAY) I thought I will do a FUN post for you all and I came up with this. Hope you all like it.

Products Used:

  • KKcenterHK Nails Printing Mode (hearts). You can buy it HERE for USD $2.67
  • Deborah Milano Shine Tech:55 (SWATCH HERE )
  • Revlon Top Speed Nail Enamel: PEACHY
  • Maybelline Express Finish:Top Coat

How To Use:

My Experience:

  • One has to be really very careful while peeling the sticker otherwise the sticker might tear and the design will get ruined. But no matter how carefully and quickly I peeled off the sticker, it tore. 
  • Some part of the sticker was stuck on the nail and was really difficult to remove.
  • Many stickers got wasted because of this.

BUT still I managed to do it PERFECTLY at last. The final result was quite BEAUTIFUL and was liked by my hubby too. Hope you guys had fun reading. I had real fun doing it :)
P.S. Product sent by PR. HONEST review.


Thank you, makeupandfashionfreak
Check out makeupandfashionfreak blog
http://makeupandfashionfreak.blogspot.in/2012/09/notd-pretty-heartd-tutorial.html

Black cats... will they bring me any luck!? by nailcrazy69


Hi my friends!

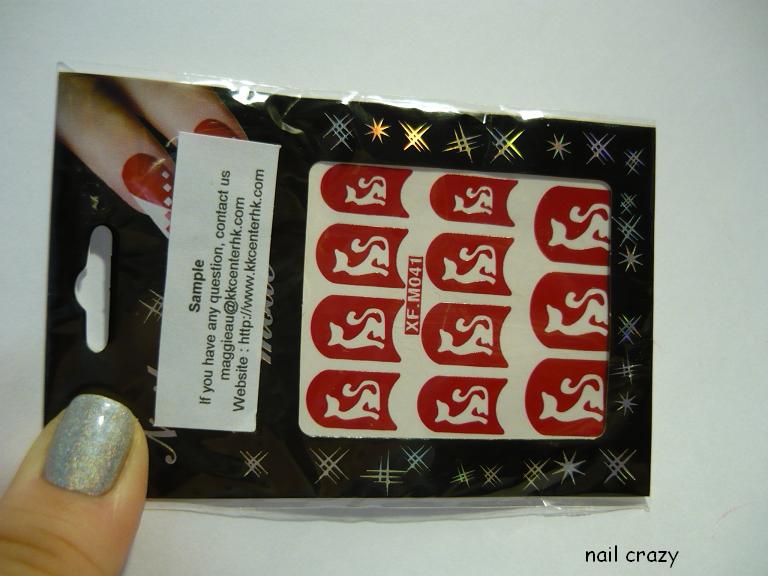
I have another of KKCenterhk.com's goodies for you. This time it's the nails printing mode with cats!

Danas imam još jednu zgodnu stvarčicu iz asortimana KKCenterhk.com. Ovaj put su to šablone s macama!  

You have to unpack it, of course.
Morate ih raspakirati, naravno.
First step is to stick one of them on your nail...
Prvi korak bio bi staviti neku od njih na nokat...
 after that you need to apply generous coat of any nail polish, pull the sticker up... oops!
nakon čega treba nanijeti velikodušan sloj bilo kojeg laka, povući naljepnicu... ups!
If you end up with the result like I did, you're doing something wrong. That's why there are instructions on the back side of cover, read it carefully before you start to do anything, don't get smart like I did . The glue is pretty strong so you really need to stick it few times on your skin, before it goes on nail.
Ako završite s rezultatom poput moga, znači da nešto radite naopako. E, zato služe uputstva na poleđini, treba ih pročitati prije no što se krene išta raditi, ne pravite se pametni poput mene . Ljepilo je prilično jako pa ga treba više puta zalijepiti na kožu prije no što dođe na nokat. 
After reading the instructions the results will definitely be much better, just look at mine . Applying topcoat over it is not a bad idea.
Nakon pročitanih uputstava rezultat će vam sigurno biti puuuno bolji, pogledajte samo moj . Nanošenje nadlaka nije loša ideja. 


I love it! It's easy and if you want something different on your nail, but you're not so sure in your drawing skills, this is great solution for you! The only downside of these modes is that if you want to wear them on every nails, they'll do just for one manicure.  But you can save a few if you put them only on a nail or two . You can find it under code: NPM-M041. But there's a really big choice of this stickers here.
Even my cat approved these stickers, see how he raised his paw!
Krasno! Uopće nije teško raditi s njima i kad želite nešto drugačije na noktima, a niste baš sigurni u svoje crtačke vještine, ovo je super rješenje! Jedina mana je što će poslužiti samo za jednu manikuru, ako ih stavite na sve nokte. Ali možete ih i razvući, tako što ćete ih upotrijebiti samo za nokat ili dva . Možete ih pronaći pod kodom NPM-M041. A veći izbor možete vidjeti ovdje. 
Čak je i moj mačak odobrio ove naljepnice, vidite kako je podigao šapu!


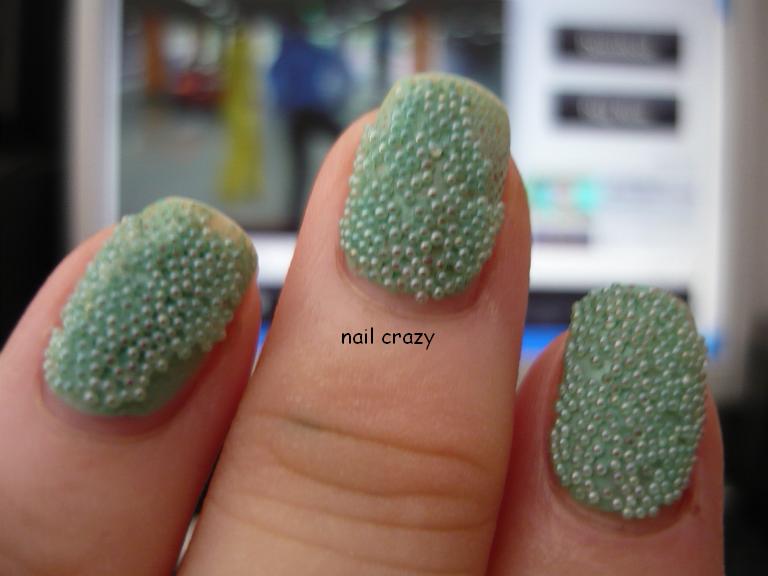
I promised you yesterday to show you my caviar manicure 24 hours later. In that 24 hours I had an average day, I prepared a lunch for my family, wash the dishes, did some minor cleaning around the house, took a shower before I went to bed, sleep all night, went to the shopping this morning, prepared a breakfast... so, I'm really impressed, I thought they'll all fall off in a few hours. If they were meant to be wear on a special occasion, they would most certainly fulfill its mission. You can't wear it all day... or maybe you can - if you don't do anything ... when I think of it, it's not a bad idea at all .
Jučer sam vam obećala pokazati kavijar manikuru nakon 24 sata. U ta 24 sata imala sam sasvim prosječan dan - spremila sam ručak, oprala suđe, odradila nešto sitno spremanja po kući, istuširala se prije spavanja, spavala skoro cijelu noć, jutros bila u shoppingu, spremila doručak... i moram priznati da sam zbilja impresionirana, mislila sam da će jedva izdržati koji sat. Kad bi se ovakva manikura nosila za neku određenu priliku, sasvim bi ispunila vaša očekivanja. Ne možete nešto ovakvo nositi čitav dan... ili možete - ako ne radite ništa ... što, kad malo bolje promislim i nije tako loša ideja .


While you're spending your money at KKCenterhk.com, don't forget to use my nailcrazy69 code for 10 % off! Enjoy it girls!
Dok trošite svoj novac na KKCenterhk.com site-u, ne zaboravite iskoristiti kod nailcrazy69 za popust od 10 %. Uživajte cure! 

Till we meet again... keep your nails polished, Žana

p.s. this product was sent to me for review 

Thank you, nailcrazy69
Check out nailcrazy69 blog
http://nailcrazy69.blogspot.hk/2012/09/black-cats-will-they-bring-me-any-luck.html

Spoiled by Wet N Wild Don't Be Cheesy Halloween Mani (plus Nail Stencil Review!) by kimberslacquerkorner


Morning Ladies! Happy Wednesday!

Since it's officially Halloween season, I have my first Halloween mani to share with you today! Recently Maggie from KKCenterHK sent me some products to review. One of the products that I chose was a really cute cat stencil. I dig black cat manis (obviously, this is only the 3rd I've posted on this blog!), and this cat stencil was purr-fect for a Halloween manicure.

These stencils are very different from your run-of-the-mill sticker style stencil. They are a red silicon type material that really molds nicely to the shape of the nail, creating a crisp, clean image. They actually molded almost perfectly to my nails, which is a feat since I have a very pronounced C-Curve. I wasn't expecting to like these, since I've used other Nail Stencils with horrible results, but these babies really work well.

I decided to pair them with Wet N Wild Don't Be Cheesy, a really awesome yellow/Orange, as my base color, and used Finger Paints Black Expressionism for the stencils on my Thumb and index fingers. Then I added some bats on my middle finger and pinky using Bundle Monster plate BM213 and Konad Black. I LOVE how this came out!


Here's a macro shot of the stencil on my index finger:


I am loving these like woah! Cats and bats - my Halloween faves! I have to admit, I really do not want to take these off tonight.

Don't Be Cheesy is a surprise fave as well. This color kind of reminds me of the cheese you get on Movie Theater Nachos. Not a color I would normally have chosen, but I am really digging it! It also had a perfect formula and easy peasy application. Bonus!

These are the stencils I used for the cats:


Aren't these just adorable? At first I thought they would be stickers, but nope. Silicon type stencils. They have a half moon shaped curve at the bottom, which leads me to believe they are designed to placed facing you, but I am a rebel (haha) and used them facing away so other people don't have to try to flip their heads upside down to see them. They were easily placed, conformed to the nail nicely, and peeled off easily. Quick and easy to use - that makes Kimber a Happy Panda! These retail for $2.67 and can be found at KKCenterHK Online Store, Product Number NPM-M041, or click the picture above! For 10% off, use my link on my sidebar and enter code KimbersKorner at checkout.

Thanks for stopping by and Happy Polishing!
-Kimber

**Nail Stencils provided by KKCenterHk for review purposes. For more information, please see Disclaimer/Legal tab**

Thank you, kimberslacquerkorner
Check out kimberslacquerkorner blog
http://www.kimberslacquerkorner.com/2012/10/spoiled-by-wet-n-wild-dont-be-cheesy.html

2012年9月5日 星期三

NOTD: Ying si Yang! by diathings

Astazi o sa va arat o anichiura realizata cu o oja Sephora, prima mea oja de acest fel. Oja am luat-o la reducere, dar pot sa va spun ca daca dadeam pretul intreg pe ea acum ma zgariam pe ochi. Nu mi se pare foarte stralucita, mai ales ca sticluta este destul de micuta. Daca culoarea nu era una frumoasa, cum nu mai am,  probabil ca as fi uitat-o prin gentuta cu oje. Surioarei mele nu i-a placut oja, a zis ca ii mata si chiar asa si pare. In plus, m-am trezit cu surpriza neplacuta ca a doua zi sa sara de pe varfuri.


I-am adaugat un un ying si yang pe inelar. Am ales acest model de pe site deoarece mi-a amintit de primul medalion pe care mi l-am cumparat, care era un semn ying si yang.


O alta varianta de NOTD cu aceasta culoare ar fi :


Pozele de mai sus sunt facute cu telefonul, asa ca culoarea nu e chiar cea reala, dar puteti observa aspectul matuit al lacului, caci aici nu am aplicat top coat peste.

Am folosit, pe langa oja Sephora, chestiute de unghii de pe kkcenterhk


Daca va intereseaza sa va luati ceva de pe KKCenterhk, cu codul "dia" aveti 10% reducere. Codul este valabil pana in 31 ianuarie 2013.

Cum vi se pare manichiura mea?


Thank you, diathings
Check out  diathings blog
http://diathings.blogspot.ro/2012/08/notd-ying-si-yang.html

2012年8月17日 星期五

Zoya Rory and KKcenterHK Printing Mode by mylifeinpolish


Shade
Hi Ladies and Gentlemen (there's gotta be at least one right?).  I'm not normally a pink person but I do love foils so I decided to give Zoya Rory a shot.  Oh wow she's so beautiful!  Rory is a bubble gum pink foil polish.  This is two coats but one thicker one would have been fine as well.  On my accent nail I used another printing mode (basically a stencil) from kkcenterhk.com.  Click here to see the one I used on their website.    This was super easy to use.  I just stuck it to my hand a few times to remove some sticky then placed it on the nail.  I used Zoya Trixie to fill in the design.  Then you just peel it up, wait for it to dry some and then topcoat it.  Easy peasy lemon squeezy!

Sun
While Zuza is my favorite from the Zoya Surf collection I think Rory is close behind.  What's your favorite from this collection?

Take care,
Sara

*Printing mode was sent for review in exchange for my honest opinion*


Thank you, mylifeinpolish

Check out mylifeinpolish blog

http://mylifeinpolish.blogspot.hk/2012/08/zoya-rory-and-kkcenterhk-printing-mode.html

2012年8月9日 星期四

Zoya Kimber & KKcenterHK Printing Mode by mylifeinpolish


Sun
Hey Everyone!  How's it going?  Sorry for the lack of posts lately.  Hopefully now that school has started my posting will pick up some.  So today I have a review of the nail printing mode from kkcenterhk.com.  I know it's a weird name but really it's a stencil for your nails.  Here's the link for the ones I used for this manicure.  Basically you paint your nails and make sure they're dry.  I used a quick dry topcoat and just waited a bit.  Then peel the stencil off the paper backing, stick it a few times to your hand to remove some of the sticky and place it on the nail where you would like it.  They come with different sizes to accommodate different nail sizes.

Shade

For this I used three coats of Zoya Kimber, a bright hot pink foil from the Surf Collection.  I still had VNL after two coats.  After that was dry I placed the stencil.  Using Zoya Zuza I painted over it.  Then quickly pull up the decal.  You can see that some of the flower petals are misshapen.  That is completely my fault.  I realized to late that it wasn't stuck down completely.  I did a second flower using  Zoya Trixie that came out much better.  The nail printing modes are one time use but because I'm just using them for accent nails they will last a while.  I will definitely be picking up some more of these soon.  If you order from kkcenterhk use the code mylifeinpolish to save 10% through Jan 31, 2013.  I don't get referral credit or anything I just want you all to save some money.

Shade
Have a great day!

Sara


Thank you, mylifeinpolish

Check out mylifeinpolish blog

http://mylifeinpolish.blogspot.hk/2012/08/zoya-kimber-kkcenterhk-printing-mode.html

2012年8月1日 星期三

KKCenterHK Nails Printing Mode Review (NPM-M030) by zebra-nails

 Together with nail decorations from the KKCenterHK I've got NPM-M030 nails printing mode with the dolphin design.
As a base for this manicure I used my favourite holographic nail polish China Glaze Kaleidoscope Him Out.
Usage of "printing modes" was easy. I followed the instructions that were on the back side (below you can see the instruction on the photo).
I also have to say that "printing modes" are rather thin so you should be carefull when you apply them.

I'm wearing this manicure now and I'm loving it <3.


You can purchase this nail printing mode for 2,67 $ on the KKCenterHK.
Don't forget that you can use code: BLGA350IR10 for 10% off.

*Some of the product(s) in this post was(were) sent me for review. For more information read my Disclosure Policy.


Thank you, zebra-nails

Check out zebra-nails blog

http://zebra-nails.blogspot.hk/2012/07/kkcenterhk-nails-printing-mode-review.html