2014年10月17日 星期五

Ruby Wing - Kitten Heels by zebra-nails

I always wanted to try nail polish that change color in the sunlight so I'm happy to show you Ruby Wing Kitten Heels today . I got this polish from KKCenterHK.
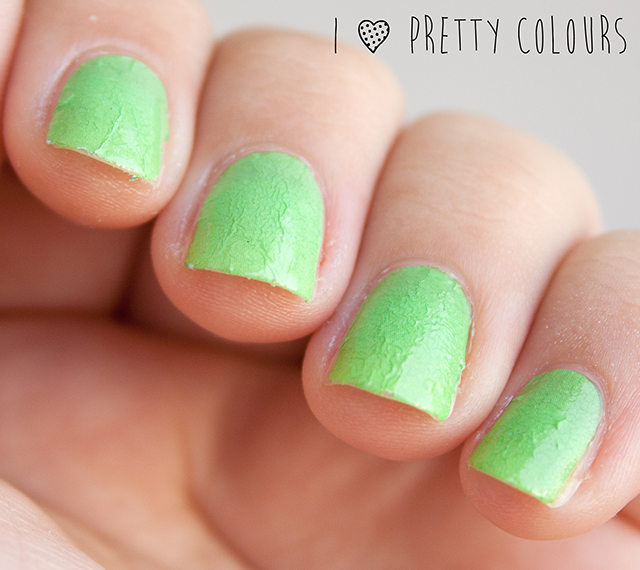
Kitten Heels is a bright pink creme in the shade that turns to a reddish pink in the sunlight.
This nail polish behaved well . Application and drying time were good.
I used 2 coats (without top coat) for the photos below.


Sunlight. Without flash.

Daylight, in the shadow. Without flash.

Sunlight. Without flash.

You can buy Ruby Wing Kitten Heels here.
Don't forget to use code ZEBRA-NAILS for 10% off from your order on the KKCenterHK (until the 31-st of January 2015).

*Some of the product(s) in this post was(were) sent me for review. For more information read my Disclosure Policy.
Thank you, zebra-nails
Check out zebra-nails blog
http://zebra-nails.blogspot.hk/2014/08/ruby-wing-kitten-heels.html

KKcenterHK Natural Eyelashes Review by misaraisu


When it comes to eye makeup, most of the time I don't really need to apply much as long as I put on cat eyeliner and thick eyelashes. I guess I'm just too used to my dramatic gyaru eye makeup wherever I go that I can't really see myself with natural eyelashes. Wearing natural lashes means I have to tone down my usual thick liner, and that's not an easy thing to do for me.

Today, I'm going to share 2 eyelashes reviews. Both are considered natural looking in my book but I guess one of them from Ardell doesn't look that natural and still have that dramatic gyaru look.

Now let's see how good they are and how I look like with the natural lashes on.


ardell dramatic eyelashes

The first one is from Ardell #134. It is not that thick and has lovely design and it's categorized as dramatic, but the result when worn is it's not so dramatic. It's pretty comfortable and the lash band isn't so stiff and doesn't hurt when worn for a long time either maybe because it's made of human hair. This pair of lashes is only $4.05 on KKcenterHK

dolly eye makeup

With this kind of eye makeup, instead of dramatic, these lashes give me more dolly look. Honestly I wish it could be more in terms of volume, but it's long enough and give a lovely look around the outer corner of my eyes.

natural cheap eyelashes

The second pair is more natural looking, from Red Chery. It's said to be 100% human hair with transparent lash band which makes it t be even more natural looking. The lash band is pretty elastic and doesn't hurt my eyelids. I hate it when eyelashes bands are too stiff and can't follow ones eye shape. But this one is a bit short and more suited for people with smaller eyes. I thought I can wear this without applying eyeliner since it looks natural. But apparently it turns out not so good cause the width is a bit shorter than my eyeline, so for me eyeliner is still needed to make it look way better. This eyelashes is also very affordable, only $3.03 on KKcenterHK.


Apparently, I like the natural look with these eyelashes on. It's pretty nice and avoid people's stares cause it looks much like real eyelashes and not artificial at all.


What do you think of these eyelashes? I think different eyelashes designs make different look. The best way is to try out which eyelashes design suits your eyes and style more ^^

Also, you can get 10% off on your purchase by entering my coupon code MISARAISU during checkout until January 2015.


Disclaimer: The products mention above were sent to me for review purposes, however all thoughts and opinions expressed are honest and entirely my own.


Thank you, misaraisu
Check out misaraisu blog
http://www.misaraisu.com/2014/08/kkcenterhk-natural-eyelashes-review.html

OPI - Green On The Runway by polish-my-nail


Nigdy jakoś nie przepadałam za duochromami. Ten benzynowy efekt fioletowo-różowo-niebieski do mnie nie przemawiał. Aż zobaczyłam ten lakier :p Uwielbiam zielone lakiery. I tu efekt zmieniający kolor bardzo mi się podoba, bo i kolory są zupełnie inne. Siedzę i macham paznokciami przed nosem  :D

I never liked duochrome polishes. All that petrol purple-pink-blue effect just didn't talk to me. Until I saw this one here :p I love green lacquers. And the changing colour effect has different colours here and I love it. Now I am sitting and keep moving my nails in from of my nose :D


Green On The Runway pochodzi z tegorocznej letniej kolekcji Coca Cola  i to jedyny duochrom. Ciemna, intensywna zieleń nabiera miedzianych tonów przy zmianie kata patrzenia, aby w końcu zmienić się w ciemny brązowo-czerwonego lakier. Niesamowity efekt! 
Konsystencja dobra, nieco rzadsza. Lakier potrzebuje dwóch warstw do pełnego krycia. Wysycha szybko, nie bąbelkuje. Pędzelek puchaty, plaski, równo ścięty nabiera dużo lakieru, wiec koniecznie trzeba usunąć nadmiar. Jak dla mnie wszystko jest super :)
Na zdjęciach: 2 warstwy + baza (Sally Hansen Maximum Growth plus)


Green On The Runway come from this summers Coca Cola  collection and it's the only duochrome in the bunch. Dark intensive green catches some copper tones with different angles to finally turn to dark brown-red. Incredible effect!
The consistency is good, more to the runny side. It needs two coats for full opacity, dries fast and doesn't leave bubbles. The bush is fluffy, flat and cut straight holds a lot of polish so make sure You wipe the excess. To me everything about it is great :)
On photos: 2 coats + base coat (Sally Hansen Maximum Growth plus)


Lakier dostępny jest TU, a korzystając z kodu polish-my-nail otrzymacie dodatkowo 10% zniżki :)

This polish is available HERE and using polish-my-nail discount code You will get 10% off :)


***

Ten produkt został mi udostępniony do recenzji przez KKcenterhk


This product was provided by KKcenterhk for a review.

Thank you, polish-my-nail
Check out polish-my-nail blog
http://polish-my-nail.blogspot.pt/2014/08/opi-green-on-runway.html

review: kkcenterhk full nail water decals by iloveprettycolours

Hey everyone! 
Today's post is going to be all about these green gradient nail wraps that I got from  KKCenterHK.

The package contains 12 nail wraps and a small nail file to file off the excess. There are many different variations, but I decided to try out the gradient ones.


Once removed, you can see that all of the nail wraps are adhered to the sheet. There are no score lines, so that means that you will have to cut them by hand.


The tools you will need in order to apply the wraps are the following:


• the wraps
• a nail file and/or buffer
• scissors
• any tool that will help you smooth them out
• top coat

First off, you start by cutting each wrap. This process will take about 5 minutes. If you are not really capable of handling scissors (like me), you probably will end up with crooked edges :) I'd suggest leaving just a bit less than 1 mm space around the wrap and you will be okay. Then, you just need to choose the right size for each finger and you're ready for application.


Afterwards, you want to dip your nail wrap in a small cup of water (or place it on a wet sponge). After a couple of seconds, the wrap will come of its backing and will be ready for application. I applied a thin layer of top coat underneath the wrap, even though it's not written in the instructions, because when I tried without a base layer it wouldn't stick at all. After you smooth the wrap on your nail, the instructions say to apply a top coat. However, the top coat that I used crinkled the wraps and they didn't turn out nice looking :( Not applying top coat is also not an option, mostly because the wraps are really thin and they will chip in a couple of hours tops.


You get a nice looking dark green to light green gradient, but unfortunately in order to get the full gradient you need to have really long nails.


Even with a nice top coat, the wraps don't last too long, you'll get chips here and there and overall they are way to thin to be handled.


What I really loved about them is they can be removed really easy with a bit of polish remover. It says on the packaging that they are made with 100% polish, so when you remove them, instead of getting little pieces of plastic or whatnot, they disintegrate with the help of your polish remover.

Pros
• great variety of designs
• application is moderately easy
• they don't leave sticky residues once removed
• can be removed using regular polish remover

Cons
• slight sizing issues with each piece - you may need to trim them down
• crinkling after application of top coat - might be my mistake, though
• the wraps aren't scored, so you have to cut them by hand
• they don't last too long


Overall, my opinion is a bit here and there about this product. They have a couple of minor issues that when combined, make these wraps a bit difficult to handle, especially if you are looking for an easy manicure that looks good. They didn't look too bad even when they crinkled, but like I previously mentioned that might have been my mistake.
If you want to try them for yourself and see if they work, you can get these water decals here for $3.70. You can see the other designs here.
You can get 10% off your order over at KKCenterHK using the code: "iloveprettycolours".
KKcenterhk125x125jpg banner

The product was sent to me for review. However, my opinion is 100% honest and is not affected by this.

Thanks for reading :)


Thank you, iloveprettycolours
Check out iloveprettycolours blog
http://iloveprettycolours.blogspot.hk/2014/08/review-kkcenterhk-full-nail-water-decals.html

STARS MANI with Stamp Template from KKCenterHk :) by anitakulikowska89

Hejka :)

Dzisiejszy post będzie niczym specjalnym.
Aktualnie noszę bardzo proste zdobienie wykonane za pomocą płytki do stemplowania od KKCenterHk.
Spośród 7 wzorów wybrałam dwa, głównie gwiazdki i nutki na kciuki.
Sami zobaczcie:


Jak już sami zauważycie na poniższym zdjęciu widać, że płytka ma 4 wzory całopaznokciowe i 3 mniejsze.

Płytka przychodzi nam w specjalnym opakowaniu, zabezpieczona dodatkowo niebieską folią ochronną, którą należy ściągnąć przed użyciem.
Niestety z drugiej strony nie ma takiego zabezpieczenia dlatego też należy uważać żeby się nie skaleczyć przez ostre krawędzie płytki.


Tak płytka prezentuje się w całości :)

A teraz kilka słów o jej zastosowaniu w praktyce.
Nie jest źle bywało gorzej ale bywało też lepiej.
Samo odbijanie jest lekko problematyczne czasami co drugie odbicie wychodził mi cały wzór a czasami co piąte w zależności od wzoru.
Poniżej odbiłam na kartce i to już pokazuję jak to bywa z jej odbijaniem.
Używałam czarnego lakieru do stempli Essence.
Największy wzór z nutami pokazuje, że jest on źle wykończony szczególnie przy nutce u góry jest taka kropka, która ni w kij ni  w oko nie pasuje tu do niczego.
Płytkę wzięłam ze względu na te gwiazdki i chyba tylko one jako tako w miarę dobrze odbijają.
Być może jest to po części też moja wina bo nie będę ukrywać nie mam wprawy w stemplach odkąd przeszłam na ręczne malowanie.
Czemu napisałam że nie jest aż tak źle? Bo ostatnio na Ebay kupiłam z tej serii kilka płytke i 3 z nich mogę śmiało wywalić do kosza bo nic a nic nie odbijają czego sama też doświadczyła moja sis blogowa Sylwia.
Jako bazy pod stemple użyłam lakieru od Cleme Cosmetics z kolekcji Oh la la Viviane.
Nie jest to do końca róż, sama nie umiem określić tego koloru gdyż nawet tutaj moje zdjęcia nie uchwyciły jego prawdziwego oblicza.
Całość pokryłam SH insta dri. 
Viviane kryje po ok 3 warstwach choć i tu zobaczycie tylko dwie.
Resztę właściwości ma takie same jak jego poprzednicy z tej kolekcji np. TUTAJ
Lakiery dostępne są już w Drogerii Laboo za ok. 3,99zł :)


Jeśli jesteście zainteresowani produktami KKCenterHk to możecie zajrzeć TU.
Tą płytkę można znaleźć TUTAJ.
Dodatkowo gdyby ktoś chciał coś od nich zamówić to możecie powołać się na mój kod anitanails89
który uprawnia Was do 10% zniżki na zakupy z ich sklepu.
A już wkrótce pokażę Wam co dostałam od Pierre Rene za zdobycie tytułu Ekspertki Paznokciowej.
Pozdrawiam


Thank you, anitakulikowska89
Check out anitakulikowska89 blog
http://anitakulikowska89.blogspot.hk/2014/08/stars-mani-with-stamp-template-from.html

Aztecki Halfmoon z naklejkami od KKCenterHK na Miyo mini drops MALIBU :) by anitakulikowska89


Cześć Wam,
Dziś zaprezentuje Wam duet, który przez kilka dni gościł na moich paznokciach.
Miyo mini drops nr 160 Malibu, który pokazywałam Wam już TUTAJ  posłużył mi jako tło pod naklejki wodne, które wybrałam w KKCenterHk a dokładniej TU!

O samym lakierze możecie poczytać w ostatnim poście natomiast dziś będzie słów kilka o samych naklejkach.
Naklejki wodne któż ich dziś jeszcze nie zna?
Są fajne i szybkie w obsłudze szczególnie są dobrym rozwiązaniem na wyjścia kiedy nie mamy czasu na zrobienie czegoś własnoręcznie lub też dla tych osób mniej zdolnych.
Każda kobieta chcę wyglądać pięknie i to nie tylko jeśli chodzi o twarz, włosy czy też strój.
Paznokcie są również naszą wizytówką ja nawet słyszałam, że kobietę zadbaną można poznać po paznokciach.
I chyba coś w tym jest.
Coraz częściej na co dzień spotykam się z kobietami, które prócz lakieru na paznokciach mają coś jeszcze, 
a to paski a to kropki, gradient ale czasami też naklejki, które dziś spotkać na polskim rynku nie jest trudno.
Motyw jaki wybrałam sobie w ramach współpracy przypomina mi wzór aztecki w dodatku w stylu halfmoon.
Niczym się nie różnią od pozostałych, które już posiadam a mam z różnych źródeł.
Przyznam, że jedne są bezproblemowe a drugie czasami wymagają większej uwagi i perfekcji.
Praktyka, ćwiczenie czyni mistrza.
Dlatego jeśli Wam za pierwszym razem coś nie wyszło to nie poddawajcie się i czasami dłużej daną naklejkę potrzymajcie w wodzie.
Kilka razy już Wam podawałam jak się takie naklejki aplikuje na paznokcie, nie ma tu żadnej filozofii. Pierwsza podstawa to suchy, wyschnięty lakier.
 A potem....
Wybieram motyw z listka, wycinamy go, odklejamy folie ochronną, wrzucamy do wody, po ok.10-15sek wyciągamy ją z wody. Sama schodzi z kartonika i dopiero wtedy naklejamy na paznokieć wybierając dla siebie dogodne miejsce. Nadmiar wody usuwamy poprzez przyłożenie wacika bądź też chusteczki higienicznej do paznokcia.
Całość malujemy topem i gotowe!


Nie zapomnijcie o odklejeniu tej właśnie folii przed włożeniem naklejki do wody!

Tylko tyle mi potrzeba było do wykonania tego mani :)
Naklejki, które dostałam znajdują się na listku kartonowym zwanym też blister. Jest ich 20 szt różnej wielkości. Pokryta jest ona dodatkową ochronną folią. Kupić ją można TUTAJ w cenie 2$ USD.
Te jak i inne produkty z ich sklepu możecie kupić o 10% taniej korzystając z mojego kodu zniżkowego 
anitanails89.
I co powiecie o takim sposobie ozdabiania paznokci na szybko?
Pozdrawiam :*


Thank you, anitakulikowska89
Check out anitakulikowska89 blog
http://anitakulikowska89.blogspot.hk/2014/08/aztecki-halfmoon-z-naklejkami-od.html