
Hey guys!! It feels like it's been forever since my last Mani Monday
tutorial, so for my comeback, I tried my best to give a different feel
to my design. I tried to incorporate as much techniques as I can into it
from gradients to fimo. It's like a mini challenge for myself also
kekeke... To be honest I'm pleasantly surprised about the outcome and I
hope you like it too. So now I present to you my interpretation of the
perfect view through my nails...Let's get started!
1. Start of with a base coat and paint all your nails a crisp white.

When doing "experimental" nail art, see to it that you start off with
white as base so that the colors that you would use next will stand out
more.
2. Sponge away your gradient scenic view

Using a makeup sponge dipped into blue polish then dabbing the excess,
lightly pat it to the upper third of your nails. This will become the
sky of our view

Using a makeup sponge dipped into a blue green or turquoise polish then
dabbing the excess, lightly pat it to the middle third of your nails
slightly overlapping the blue.

Using a makeup sponge dipped into a green polish then dabbing the
excess, lightly pat it to the lower third of your nails slightly
overlapping the blue green. then ever so slightly dab random brown/tan
polish over the green polish to give it some dimension.

Sponge up random irregular white shapes over the blue to make it look like clouds.
REMEMBER: This step doesn't have to be perfect coz it's actually just the background :D
3. Stripe up your bamboo ♥
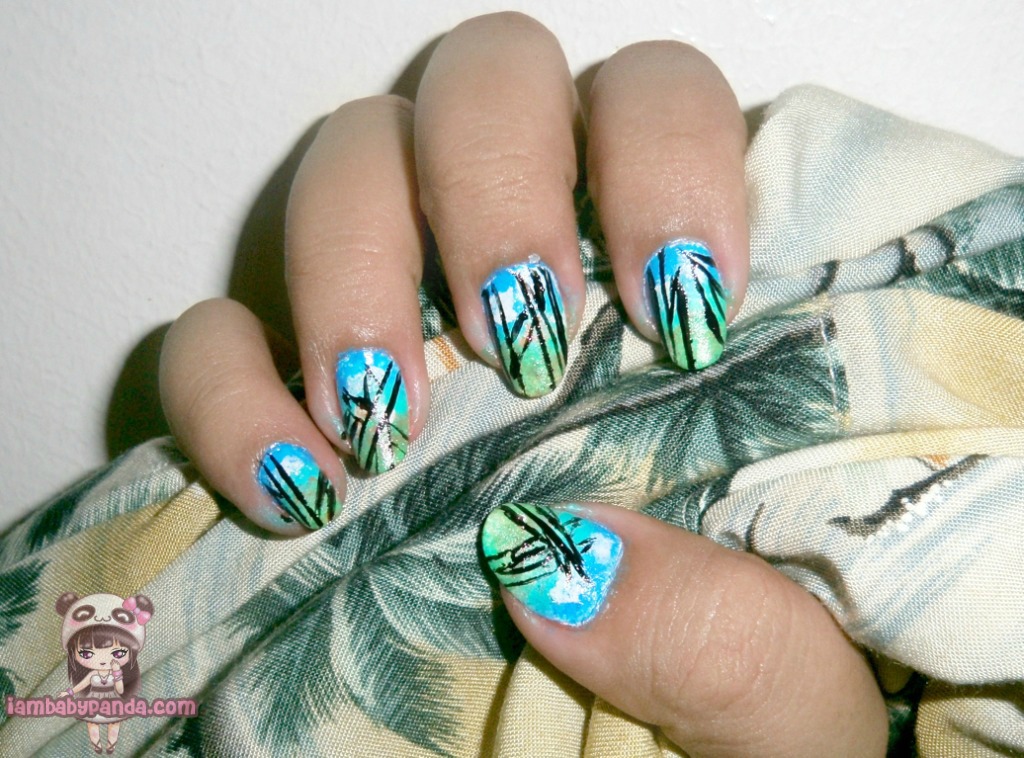
Using a striper or dotting tool dipped into black polish, draw random
thin parallel lines from the lower third of your nails up. You can close
the tip as you wish or draw the parallel lines all the way up.

Fill out the parallel lines with white polish so that the colors will stand out more

Fill out the white parts with a pastel green polish

Using a forest green nail polish, draw the details of the bamboo by lining some horizontal stripes across it.
3. Making the Panda

Make sure to cut the fimo canes AS THINLY AS POSSIBLE beforehand. This
was the first time that I used fimo for nail art and I gotta say that
too bad I wasted all those years not taking interest on them. It's
thanks to KKCenterHK that I was able to try them out. They sell lots of beauty stuff from nail art materials to false eyelashes. I got my panda fimo canes (N.NAIL Little Panda Modelling Clay Nail Decorations) on their website and it comes with three pieces.

By applying a dab of clear polish over your design where you want to put your fimo, and using tweezers place and press them down on to your nails.

I decided you draw a body for these little critters so using a dotting
tool dipped into black polish, dot circles and ovals as the arms and
legs and using a dotting tool dipped into white polish, dot a big circle
for the body.
4. Use a top coat to protect your design from chipping away

And that's it!!! I hope you enjoyed my comeback Mani Monday. And please do check KKCENTERHK out just type IAMBABYPANDA on the check out to enjoy 10% off your purchases. If you try this don't forget to give me some news. Post pictures on my Facebook, my Twitter, send a link on the comments below or even on Instagram, my username is Iambabypanda also. I hope you have an awesome week ahead and I'll talk to you guys soon!!
So Much Love,
Ina ♥
Thank you, iambabypanda
Check out iambabypanda blog
http://www.iambabypanda.com/2012/11/mani-monday-scenic-panda-nails.html
沒有留言:
張貼留言