Hi, everyone! I got a set of water decals a few weeks ago and finally
got to use them last week. It was my first time using water decals. It
wasn't as easy as applying nail stickers but definitely not as hard as water marbling ;]
Decals are basically printed designs that you can transfer onto another
surface upon contact. I know of three kinds of nail decals so far.
- Stickers - peel then stick; designs can be small or ones large enough to fit the entire nail
- Rub-on decals - designs are transferred just by rubbing them on the nail
- Water decals - designs are transferred using water
I planned on creating galaxy-themed nails but my blue-purple gradient
turned out more blue and less dark than I hoped. So I added stars to
make my nails more galaxy-themed.
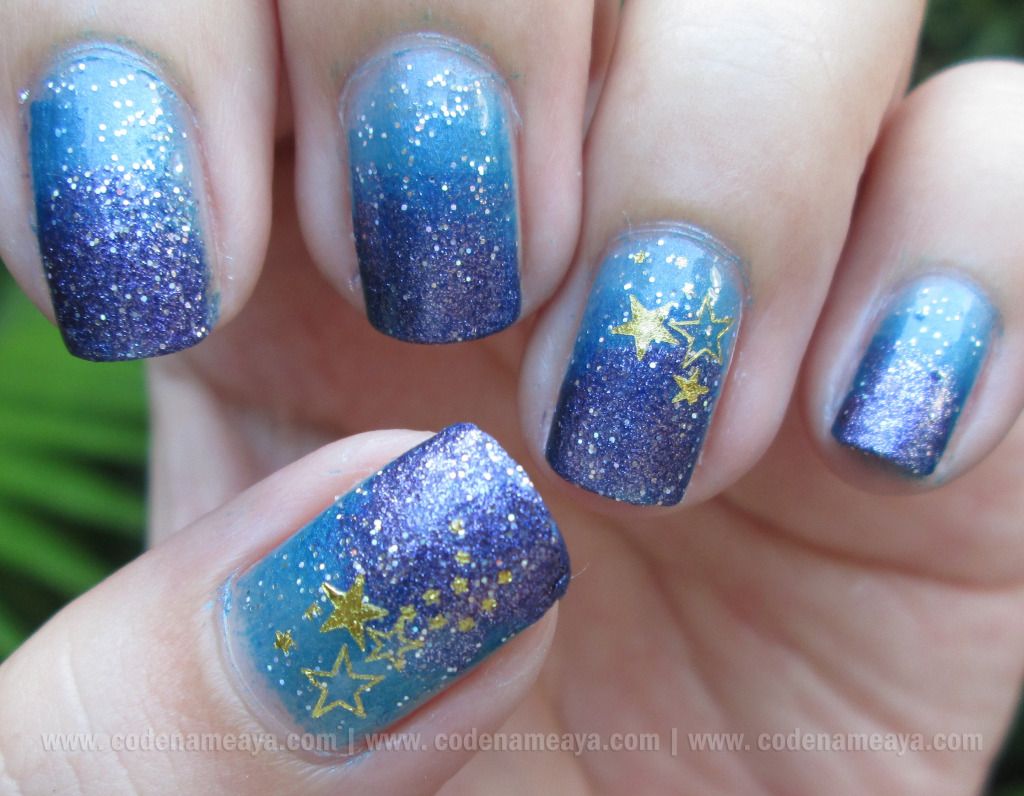
You see the stars there on my ring finger and thumb nails? I didn't
paint those on! They're actually just nail water decals. Read on to know
how I applied them on my nails :)
Applying water decals might be hard at first because they're not just
like stickers where you just peel off and stick, but you'll get used to
it.
The particular nail decals that I used obviously couldn't cover up the entire nail. They're just add-ons to my nail design.
You will need the following:
- nail polish(es) of choice
- water decals
- scissors
- tweezers
- small bowl of water
- orange stick
- top coat
Before you apply the decals, apply base coat and your base color/design. Now bring out the nail decals.
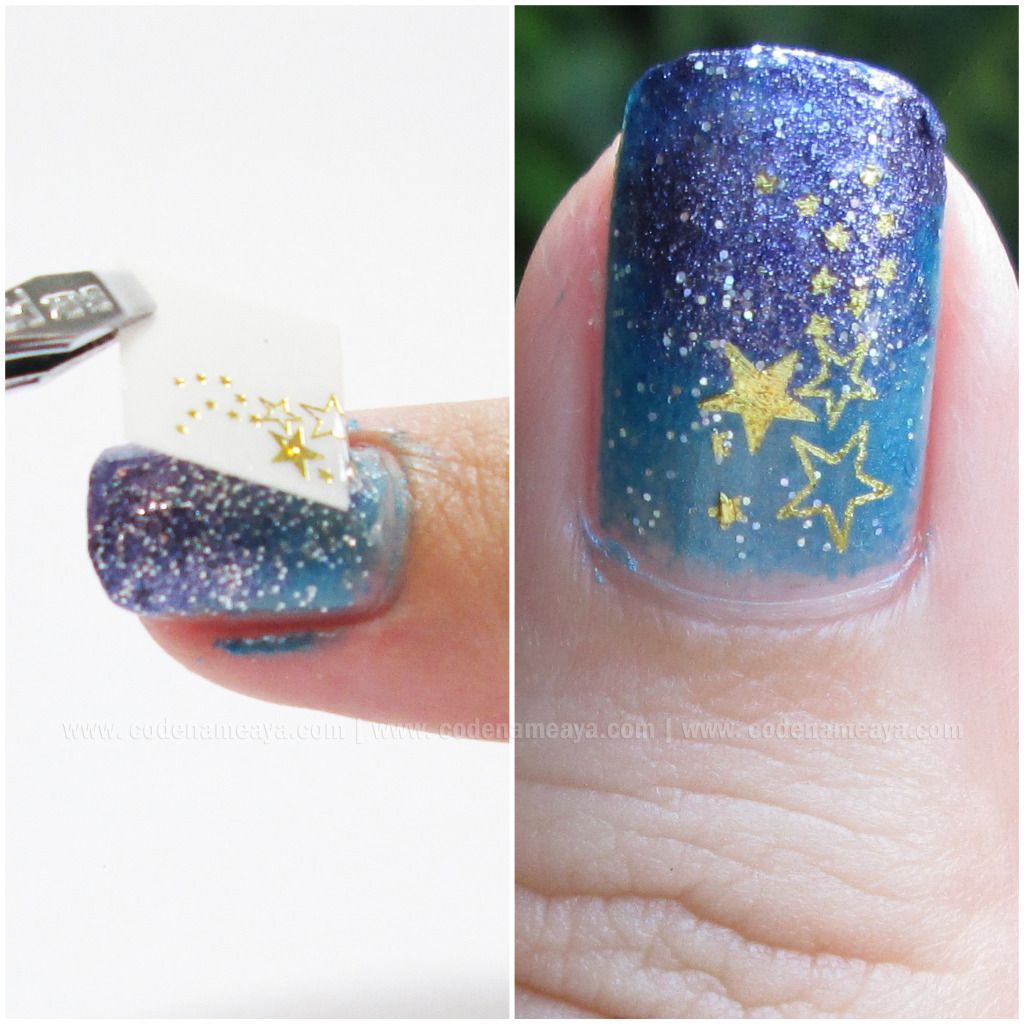
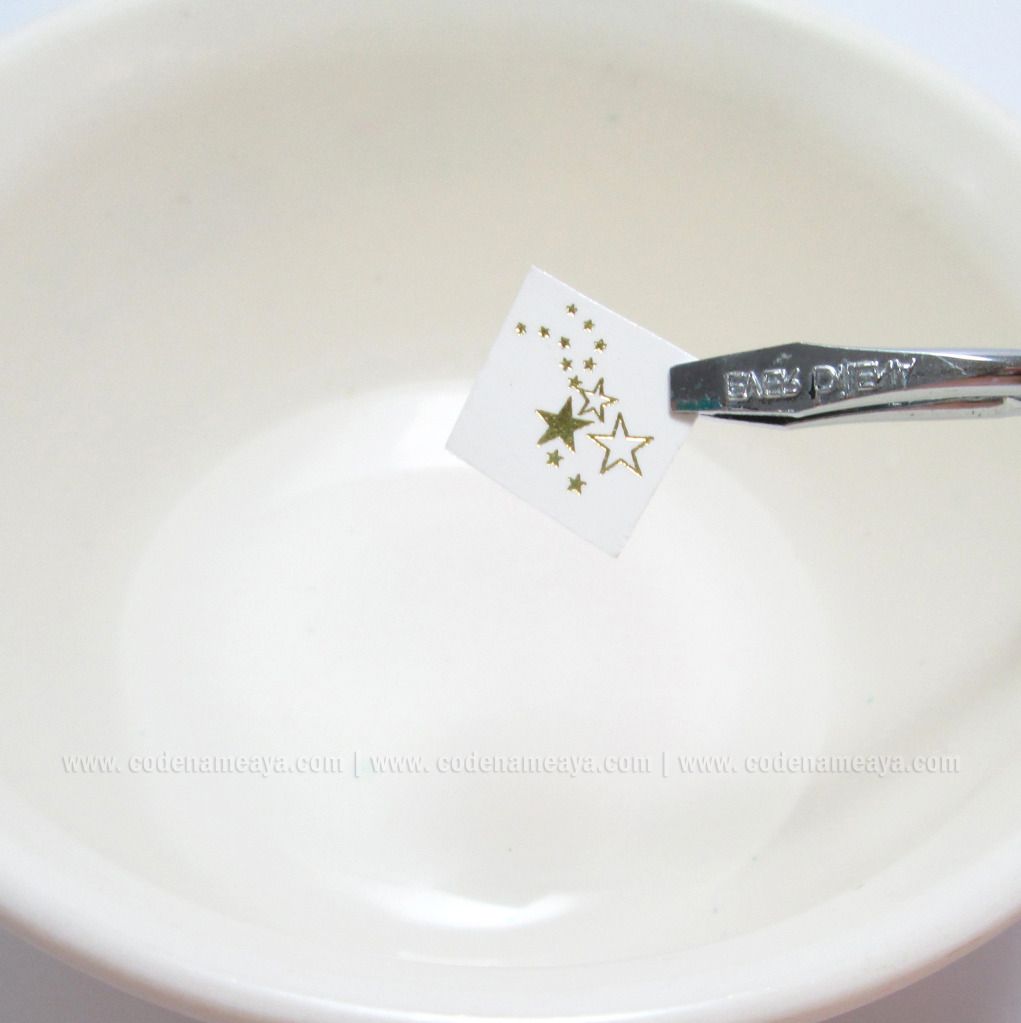
1. Cut around the design.
Note: I cut off a tiny square piece but I suggest you cut along the
outline of the design. Make sure to leave some space outside the design,
though.
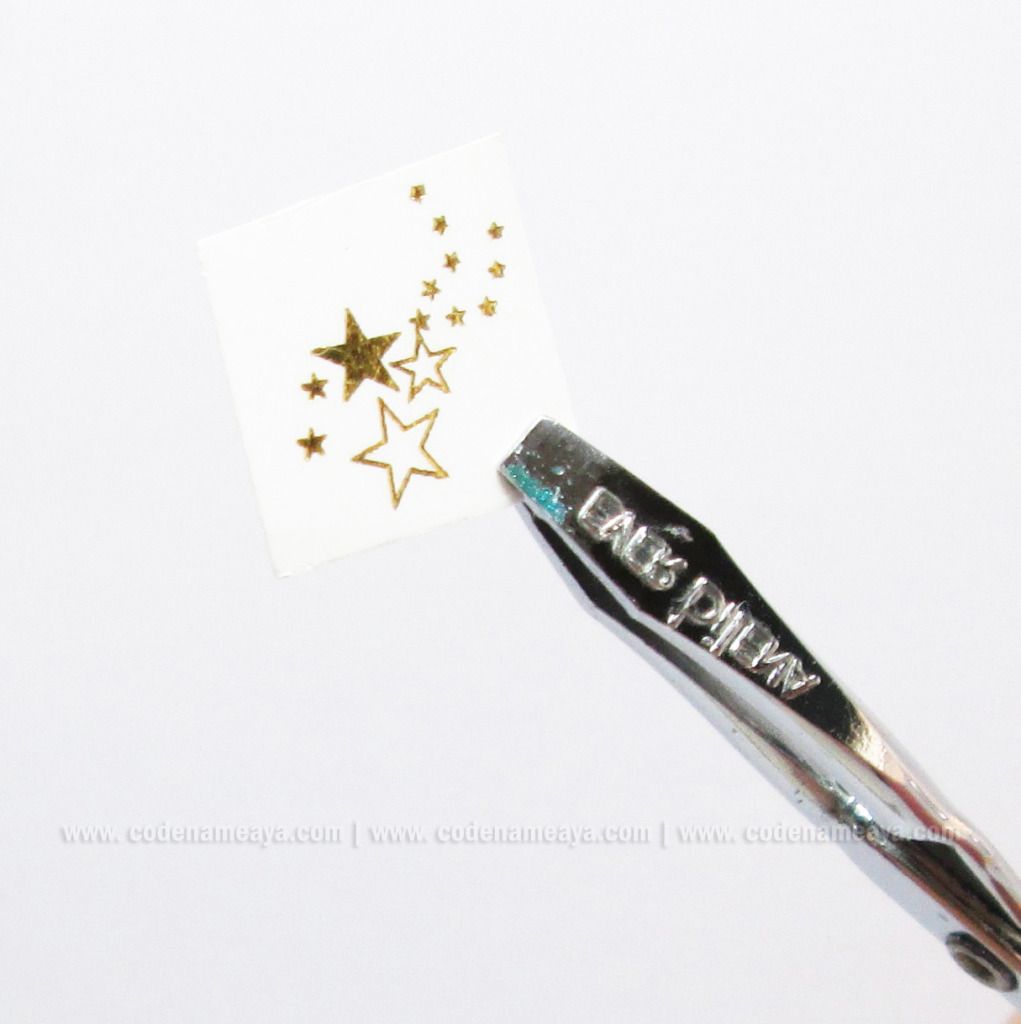
2. Dip the piece in a small amount of water. You won't be able to peel
the design off while it's dry. Wait for the design to loosen up from the
(white) backing paper, but don't wait for it to totally come off. You
can check to see if it's already loose using tweezers. When it's loose
enough, you'll be able to slide the design off easily from the backing
paper using the tweezers.
3. Once it's loose enough to slide off easily, slide the design off a
teeny tiny bit to leave just a teeny tiny bit of design hanging on the
edge of the piece. Remove it from the water then position it on your
nail.
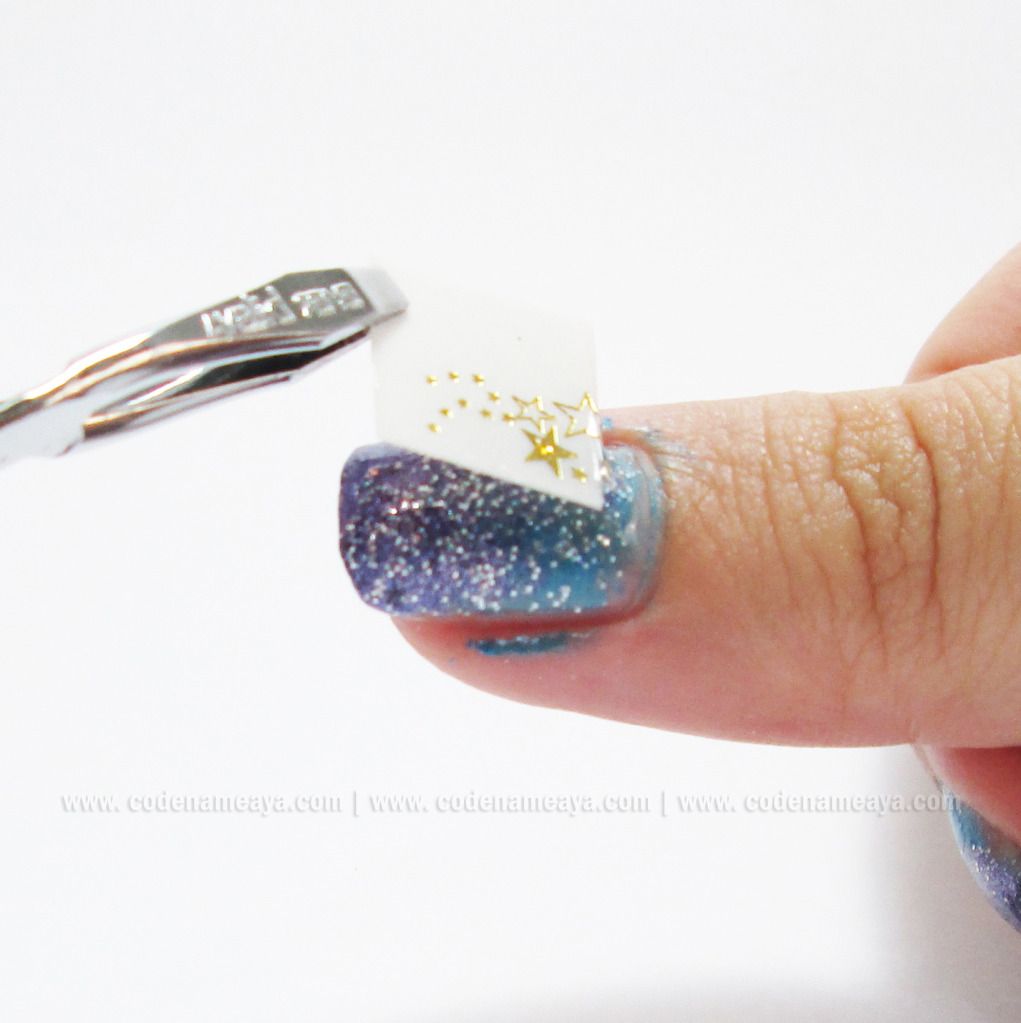
4. Once you've figured out where to put the design, lay the 'hanging
part' on your nail. Slowly and carefully slide the backing paper off
while letting the bulk of the design lay on your nail.

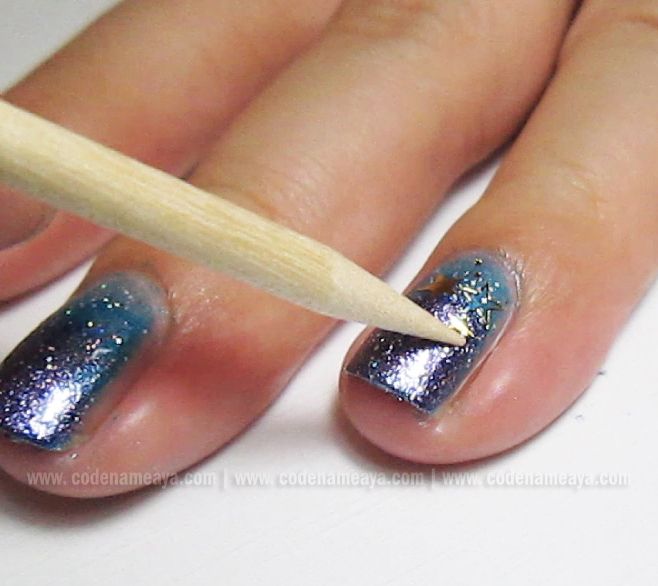
5. Use an orange stick to push the design flat on your nail, get rid of air bubbles and reposition the parts to your liking. When wet, nail decals are not sticker-sticky so you can scrape them off or repostion them without ruining your base color.
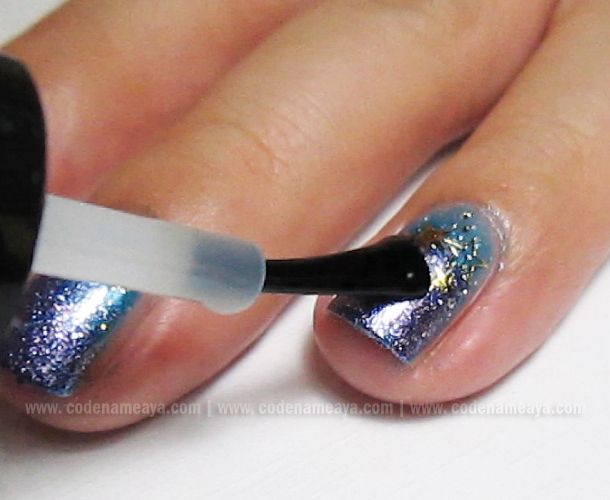
6. Apply a layer or two of top coat to seal in the design.
And there you have it!
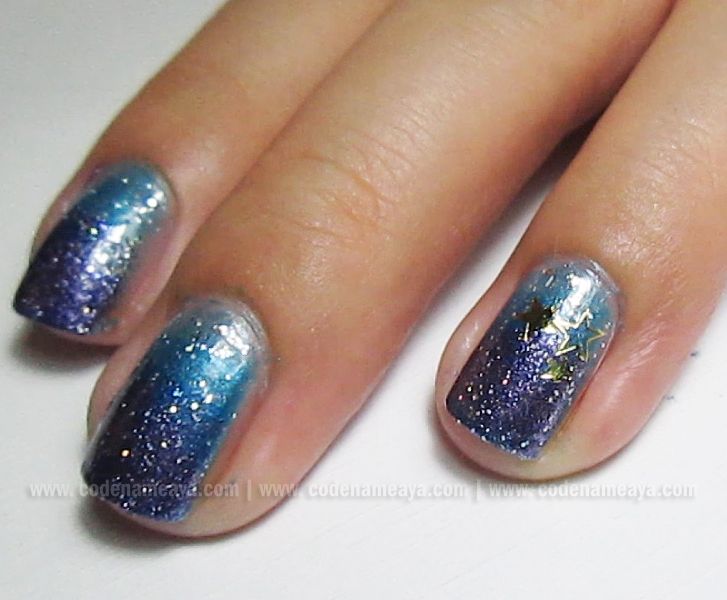
I chose not to put stars on all my nails. I chose the ring finger and thumb nails as accents.
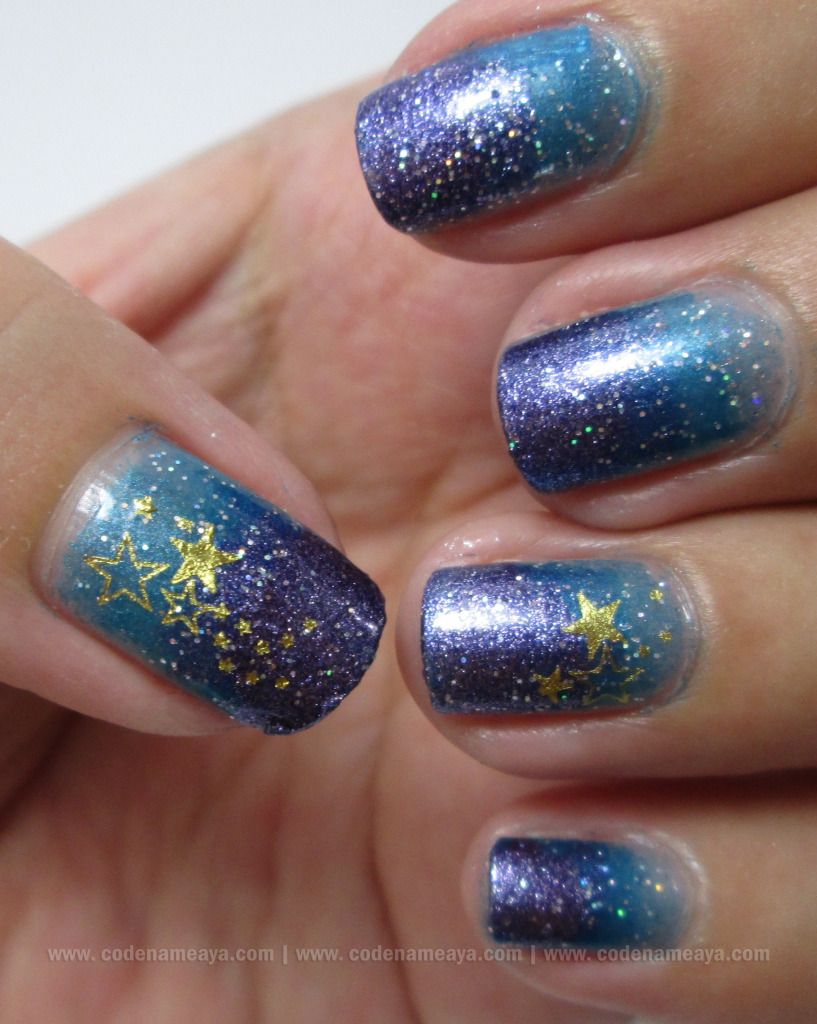
As you can see, my application wasn't the best but I think
they're ok for a first-timer. I only wasted a few stars as I was trying
to figure out how everything worked. Haha.
The nail decals I used were from KKCenterHK,
by the way. I like that these are so thin that you won't feel them on
your nails, especially with top coat on. They stayed put on my nails for
more than a week (until I changed my nail color). I think they would
have stayed on even longer if I had just let them be. They came off with
regular nail polish remover, too.
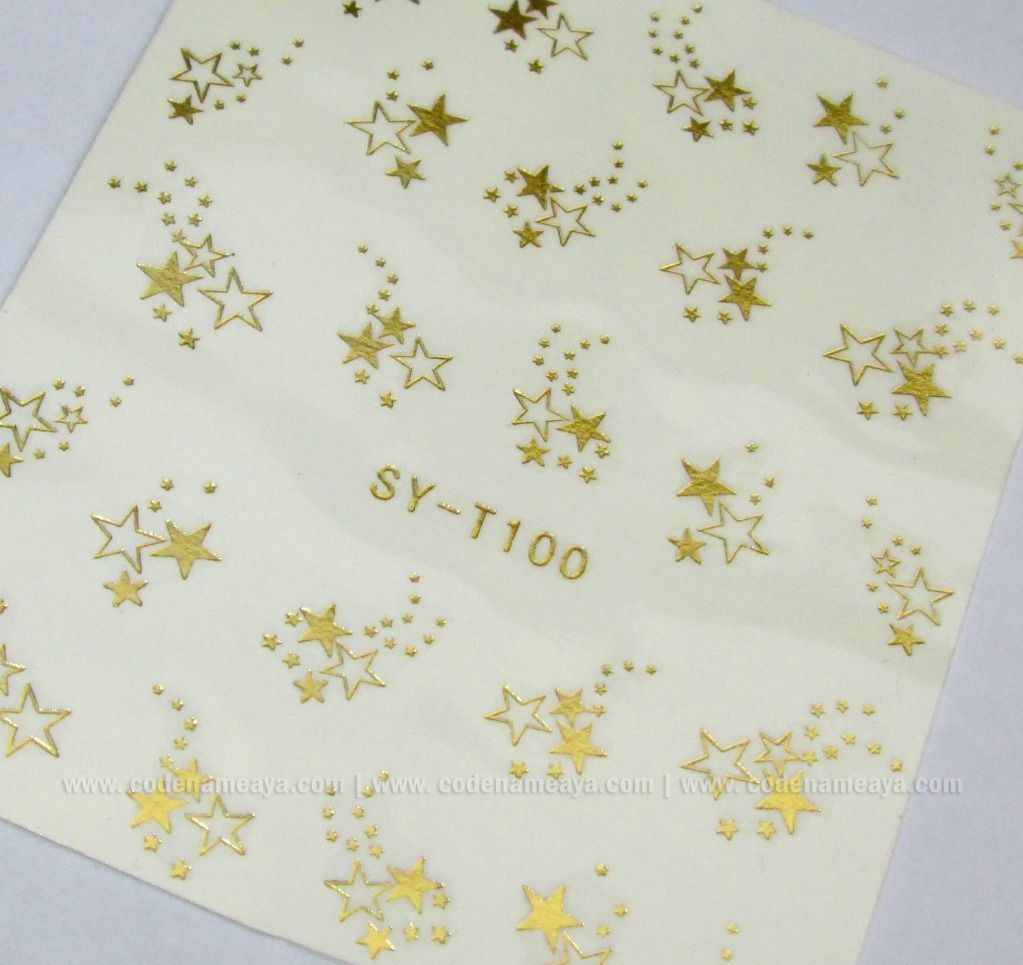
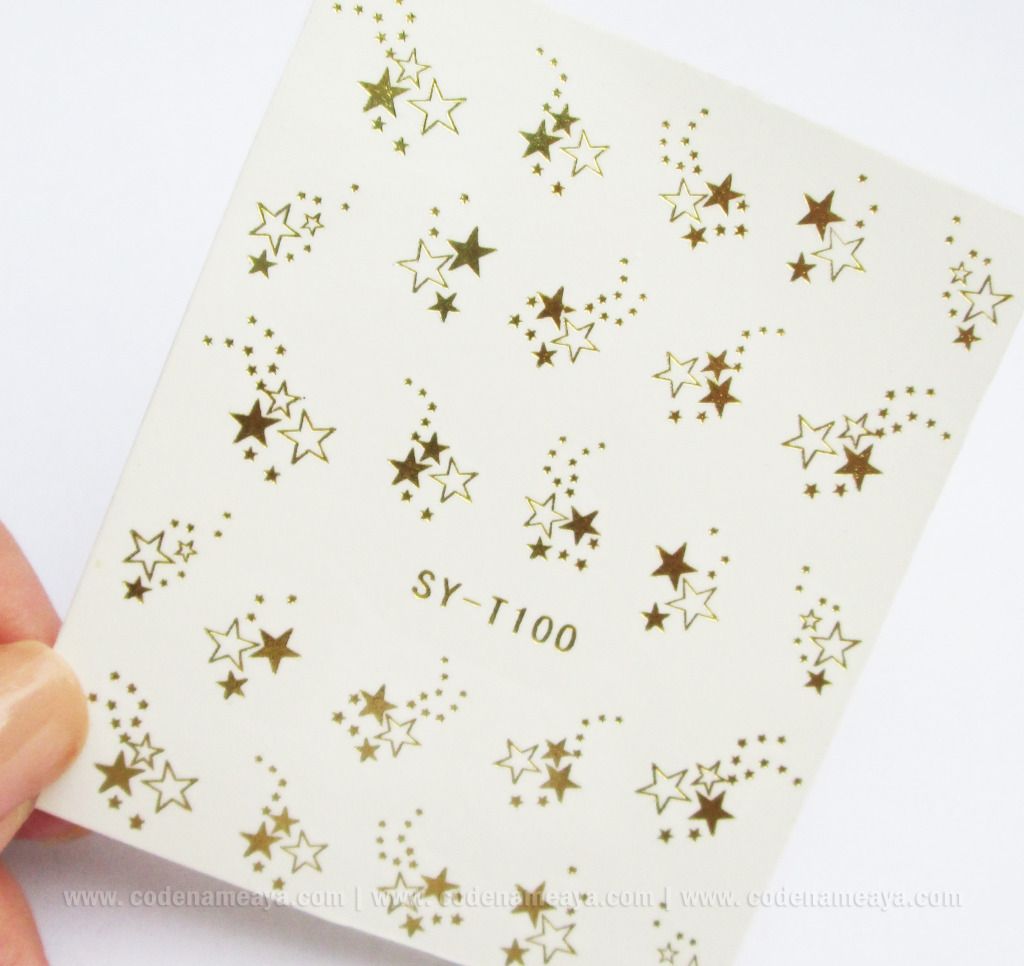
These are the N.NAIL Little Star Metallic Gold Water Decals (SYT100).
One sheet contains 25 decals which aren't all the same, as you can see
in the picture. I think it's nice that there's variety and that you're
not just stuck with just one pattern. You can get them *here* for $3.80 (~P173). You can use my coupon code *here*
to get a discount :) A bit expensive for nail decals for me, but I
really like the pattern. I can't wait to use it on other base designs!
:) If you don't fancy stars, you can choose other designs. They have a
lot, I tell you. Visit their nail art section *here* to see all the nail water decals available.

I'm gonna show you how to create this blue-purple, galaxy-ish nail design in another post. I hope you stay tuned for that :)
Disclaimer: Product was sent to me by
the company for review but the views and opinions expressed in this
post are purely mine and based on my own experience with the product.
Embedded links are affiliate links.
Thank you, codenameaya
Check out codenameaya blog
http://www.codenameaya.com/2012/10/waterdecalstutorial.html
沒有留言:
張貼留言